MATERIALS
• Black 180gsm paper
• Faber Castell Hard Pastels
• Carbothello Pastel Pencils
• Art Spectrum Soft Pastels
• Using colours of various hues of blue, green, aqua, beige, cream, white, red and black.
• Rag cloth
• Erasers
• Spray fixative
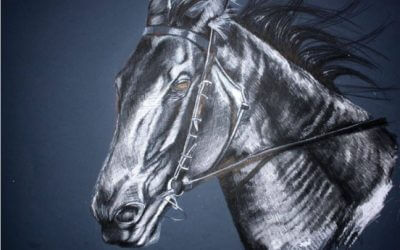
This demonstration follows a series of art which I’ve done in pastels, on 180gsm black paper which does not have a heavy texture, but sufficient to create “highs and lows” with the pastel application. The use of black coloured paper is the cue here, because the idea is to create something ‘heavy, deep and very strong… in this case it’s the surf and imagined at night time. Nighttime surfing here in Queensland is a growing activity and taking on the best of surfers. (Not me….).
STEP ONE
Very basic application here of a squiggly line to represent the top of the wave, running left to right and down the right hand slope of the gathering section of the wave… easy. If you cannot visualise your subject, then of course use some sort of reference but I sometimes think a reasonably accurate representation is all that’s necessary. The real accuracy comes later.

STEP TWO
Let’s now get some transparent looking blue into that tunnel of the wave. As in most pieces of art, you will start at the background and work your way to the foreground … the ‘tunnel’ is the background of this painting, so keep it light, hazy and vague. No detail. Using a hard pastel, this part should be given a very light smoothing with a piece of cloth, a finger tip, or eraser just to smooth it out. Do not do this with any great pressure. We do not want to push the pastel too deeply into the texture of the paper.

STEP THREE
Work your way outwards from the back of the wave with very light strokes with the side of the hard pastel. You will see that the light touch approach makes the colour just touch those upper points of the paper’s texture and is starting to give the highs and lows of the wave’s many water tips. On the top of the wave, smudge in some lighter blue to commence the spray effect.

STEP FOUR
We do two things here. Darken the blue under the very top of the wave this is virtually an area of reflected light and helps to give the illusion of bringing this closer section of the wave towards the front of the painting. Grab a green/aqua pastel and slide it down the face of the wave, with attention to the wave’s inner curve line. We also introduce a light blue/white with a heavier pressure on the pastel, onto the top of the wave, giving it that top-heavy look and gives the wave movement. It’s now starts to look as if it’s going to fall! With the tip of the hard pastel, create tighter, heavier white on that top edge of the wave, making the spray look like many water drops. This is done with a combination of some rubbing and overpainting of the wave tip. To be sure of that spray versus droplet look, smudge in the spray, then use a spray fixative which will ‘fix’ the pastel. Then overpaint with a stronger white that will not smudge the spray and thus give more depth to the wave.

STEP FIVE
Now we bring in the surfer. This is a simple figure on a simple board, with a suggestion of a bow wave and wake for the movement. The posture of the surfer must indicate fast forward action and thus an “off-balance’ pose. Together with the wave motion, we now have ‘action’ in the painting

STEP SIX
Some more detail on the surfer and his wake. Also include some loose line detail in green and blue on the wave towards the front of the painting. This puts the surfer into a true ‘focal point of the artwork and using that artistic cliché of the ‘golden rule’, he is now neatly placed at about the two-thirds down and two-thirds across the painting.

FINAL STEP
Touch up the surfer detail. A few highlights, a reflection and some more white wave splashes around him. Make sure his bow wave, wake and the obvious speed of the wave are the same. You now have a powerful piece of moving artwork with plenty of perspective, depth and heaviness.

ARTIST’S HINTS AND TIPS
• Spend time getting used to soft, light and heavy pressure on your pastels.
• Utilise the above, onto different weights of paper to see how the pastel touches the high spots of the paper and the effect that gives you. Get as many references as you can and file them into subjects.
• Practice your drawing skills … tracing paper helps but you need to know how to work out dimensions, angles and shapes. This helps to establish your initial sketch drawing without too much time wastage.
• Plan your colour palette for every painting. Don’t just make it up as you go. Be aware of your colour wheel, primaries, complements, etc.
• Have fun. If you have a commission, enjoy it. If it’s a ‘spec’ painting think of it as another test run. Allow yourself to make the odd mistake – none of us are perfect.