MATERIALS
• Canson Mi Teintes TEX Paper 490 in light blue, 355gsm
• Putty eraser
• Masking tape – for taping up outer dimensions
• Pastels (soft)
Art Spectrum
Unison and Schmincke
Sky colours
Art Spectrum (AS) – Phthalo Blue – T530, V530, X530
Clouds – shadows
AS Blue Grey V527 – Highlights – Schmincke White
Headlands
AS Blue Grey T527
Background ocean
AS Prussian Blue P528, AS Phthalo Blue P530, AS Phthalo Green T570
Whitecaps
AS Phthalo Blue X530. Highlights – Schmincke White
Main Wave
Unison Blue Green 10, 12, AS Phthalo Green V570, T570, AS Turquoise T535
Sand and foreground
AS Burnt Sienna T548, AS Raw Sienna P544, AS Burnt Umber T552
Aerated and curling wave
AS Phthalo Green T570, V570, X570
Foam on main wave
AS Cool Grey X582, Schmincke White
STEP ONE
Using the photo as reference material, I crop it to what I regard as an interesting part, then alter the line of the wave to help create distance and lead the eye further into the composition. I also rule and measure the horizon line so that it is straight. Crooked or bumpy horizons don’t look good nor real. The I sketch in the basic wave shape and headland positions. I don’t sketch in much detail, but if you find it easier to mark up the subject in a grid then by all means do so. Whatever helps.

STEP TWO
Starting with the sky and working top to bottom, I bend in the three sky colours by firstly dragging the pastel on its side over the paper, overlapping the colours slightly and then blending them all with my fingers to create a smooth, clear sky finish. Note that the sky is darker at the top and gradually becomes lighter near the horizon. Next I place in the headland, followed by the fluffy clouds. These I blend lightly and unevenly to achieve depth and allow the shadows to show through.

STEP THREE
Now the background ocean starts – mix the blues (refer to pastel colours used) in a weaving pattern to simulate ocean waves. Try different strokes to find what works best for you. Follow the direction of the water flow and create darks and lights. A hint of whitecap placement can be done now with the Phthalo Blue – the highlights will be done in the final stages with Schmincke White to make them ‘pop’. Also, any whitecaps that are deemed superfluous can easily be erased with the putty eraser.

STEP FOUR
Here I start to form the main wave and make it appear to curl. The base is darks mixed with sand colours, then becomes dark and finally lighter near the top where its translucent. I blend the colours with my fingers in an upward curving direction to create the curl of the wave. Make sure that there’s no hard line of distinction between these colours – blend them well. The translucency is near the top where it’s the thinnest and the sun shines through.

STEP FIVE
Now, with the side of my pastel I gently put in the shadow part of the froth and follow this by working on the aerated, downward curve of the wave. Make sure that your pastel strokes follow the direction of the water. The larger frothy area is achieved with shadow colours, light blues and Schmincke White highlights. To make the sand, mix the sand colours in an upward curve to simulate the water being drawn up the face of the wave, and create darker patches in the foreground to produce interest.


STEP SIX
Next I tackle the foreground sand and water. The intention was to make the viewer feel the ‘pull’ of the water and foam up into the wave. Areas of sand and reflected water can be seen intermingled. Now, sorry to be a pain, but I was not happy with the curl of the wave so I erased it with a putty eraser and readjusted it. This is not something uncommon, so never feel like it’s too late to reshape your work!

STEP SEVEN
The foamy patterns come next. These were superimposed over the sand and gently curve up along the front face of the wave. Notice that there aren’t even, round holes in the foam. It pays to observe the ocean waves and take lots of photos for reference.

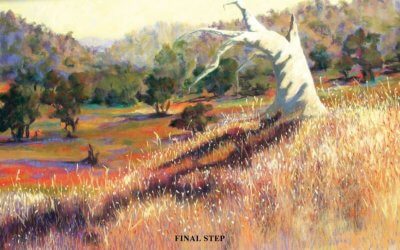
FINAL STEP
Final touches are now attended to. A few more shadowy parts are placed amongst the froth fine spray dotted in and the three distant yachts painted it. Now also the whitecaps are highlighted with the Schmincke White

ARTIST’S HINTS AND TIPS
• I find that it can be quite overwhelming if you look at the whole wave in its complexity. Therefore, I try to break it up into sections of colour and movement. Try to visualise the blocks of colour beneath the foam and froth, then start with the darks first, always being mindful of the curve of the wave. Blend your pastes in the direction of movement. Leave the area for the white froth clean at this stage.
• When forming the background waves, ensure that you create depth and movement by painting the waves in a gently undulating pattern, not straight lines.
• When painting the horizon, make sure it has softened edges, not a hard, straight line. This helps to give the illusion of distance.
• I tend to use my fingers to blend the colours, although many say not to do so. If I want to achieve a smooth result e.g. still water or clear skies, then fingers it is, however, if I want to show the effect of coarse sand or rock then I just lightly run the pastel on its side over the pastel paper, thereby allowing the tooth to show through which appears as the sand or rock.
• Try not to place the focal point in the centre, keep it off centre as this adds more interest.


