

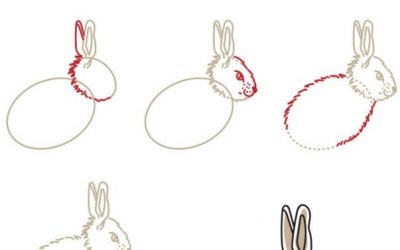
STEP ONE
Pencil sketch for composition While the initial rough sketch usually takes the least physical time of the whole painting process, it can take a considerable period to settle on the right composition before putting pencil to watercolour paper. The composition for this portrait was relatively simple and was based on a few of my reference photos stitched together to obtain the best combination of bird facial expressions). I use watercolour paper that I have pre-stretched and taped to a plywood board. I use graphite pencils in a soft, sketchy, semi-loose technique to outline and add details to the birds and branch. I’m not concerned about neatness at this stage, however, for wildlife portraits, form and perspective are particularly important – details around the focal point (usually the face and eyes of the subject) need to be in proportion, and I will erase and re-draw these details where necessary until I get them right. The pencil lines are very faint and barely visible until up close, in order to avoid excessive outlines showing through the watercolour in the final painting

STEP TWO
Inking the darks I find using a combination of ink and watercolour works well in my paintings because it allows very precise delineation of areas of detail and focus such as around the eyes and in the dark areas which cannot be achieved with watercolour alone. Using ink first also helps set the level of contrast within the piece from the beginning.

ZOOMED DETAIL
Here you can see the approach I use to add ink to the dark areas. I first create a fine outline (with a 3/0, 10/0 or 20/0 brush) to define the extent of the inked areas, then use a larger brush to fill them.

STEP THREE
Gradually expanding I continue to add ink to the dark areas throughout the composition, careful to ensure I maintain some degree of balance in the level of contrast that will be present. I do not erase the pencil lines as I will need them to guide the subsequent watercolour washes, however they are very faint and are barely visible in comparison with the inked areas. I always start my portraits with the area of greatest focus, which is usually around the eyes. This is the region where detail and a sense of realism are most important. If this first part doesn’t work the way I envisioned, I start again from scratch.

Zoomed detail
With the inked areas providing a reference point for the level of contrast, I start with several pale tonal washes; blotting and painting to gradually achieve the tones I am after. Over these washes I use fine brushstrokes to gently delineate skin, fur, feathers or scales. I don’t attempt to precisely outline every detail. After painting the head in detail, I start to paint very dilute areas of burnt sienna to the breast feathers in a rough pattern following the shadows and contours. I use relatively large brushes for these initial stages (sizes 2, 4 and 6) to keep the edges rough. I define the shadows not only with overlaid brush strokes, but I also regularly use a facial tissue to lift out areas of colour by dabbing the paper, and this helps soften edges where necessary. Once I’ve achieved the correct tonal value and approximate hue for the area I’m working on, I start using smaller brushes to add details with hatched feathering or stippling techniques and usually work with less dilute colour (you can see fine strokes defining the feathers around the face).
STEP FOUR
Working on the wing Due to the high level of contrast in the wing area, when adding watercolour I use much less dilute paint, but I still attempt to achieve a variety of textures by varying the shape of the strokes I create. The feathers of the bird are quite ruffled in this painting, so certain areas need to recede into the black depths, while others receive spots of light, and need to be kept paler. In addition, the wings of tawny frogmouths have interesting patterns of colouration so I’ve started to bring in the blue and neutral hues in the more shadowed areas.

STEP FIVE
Adding breast feather detail Part of the appeal of these two frogmouths was their very fluffed and scruffy nature (particularly the bird on the right) – it was a chilly afternoon and I had disrupted their repose! I wanted to achieve that effect with watercolours where possible. To do this required retaining variable highlighted areas where the white of the paper could shine through the almost completely transparent watercolours. Here you can see the fine brush strokes I’ve applied with a 10/0 brush over the dilute colour to better delineate individual feather shadows. The transitions needed to be relatively subtle and soft, particularly on the breast area, so instead of using pure tube colours, here I’m using mixed tertiaries solely from the palette.

STEP SIX
Working on the second bird and branch After largely completing the bird on the right, I start on the left bird, working from the focal area of deep shadows around its closed eye. The head region of this bird provided numerous opportunities for interesting stroke patterns, from the fluffy forward-pointing feathers between the eyes, to those feathers viewed from the side underneath the beak (separated by shadows). The cheek feathers of this bird also had a bit more of a pink hue, so I mixed in a small amount of permanent alizarin crimson for the details.

Zoomed detail
Although I had already added the darkest areas of shadow on the branch underneath the birds with black ink, there were many other shadows and cracks in the bark that were of moderate tone. So here I start to define these details with sepia, van dyke brown and burnt umber watercolours. For the shape of the branch and bark to be believable, here I try to roughly follow the patterns of the bark from my initial pencil sketch. You can see that I use relatively undiluted watercolours to tie in with and extend the cracks in the bark and areas of shadow delineated by the ink. I vary the tone of these slightly to add interest. I’ve also added a very pale background wash of burnt umber to the lower portion of the branch at this stage.
STEP SEVEN
Adding colour to the bark and lichen The lower branch area contains predominantly yellow-ochre hues, while the lichen covering the top of the branch was a green colour. In this step I used relatively wet and rough scumbling brush strokes to lay in broad swaths of colour to build up hue and tone.

Zoomed detail
Here you can see that I’ve used lost and found edges to define the bark and lichen/moss. In particular, after adding dilute greeny-browns in the upper branch portion, I dropped in (wet in wet) undiluted paynes grey at various points to add interest and variation.
STEP EIGHT
Detailing the branch I liked the rough random effect I had achieved with the lichen and moss in the previous step, however the branch overall was too poorly defined to suit the remainder of the painting, and had too little contrast, particularly where the birds were casting shadows. Furthermore, the birds seemed a bit out of place in the colour scheme of the branch. This commonly occurs when portraits are worked up in sections. I find the solution to this is to bring some of the colour of each element together. Here you can see that I’ve brought a reflection of some of the green of the branch into the lower body/breast portion of the birds.

Zoomed detail
In this step I used a fine brush and less diluted colours to define rough shapes at the edges of the cracks of bark and the frilly edges of the moss and lichen. I don’t aim for 100% photorealism with my portraits, but instead for a sense of character, movement and purpose. I prefer that my artwork is immediately recognizable as art, rather than photography. Here I have left out much of the lichen detail in favour of focussing on the birds.
FINAL STEP
After stepping back from the painting for a while I realised that some areas needed a greater level of shadow, or a slight variation in hue.
At this stage broad dilute washes help to tie all parts of the painting together, and take the edge off some of the overly defined textures.
Zoomed detail 1
Here you can see the final details on the head of the left bird.

Zoomed detail 2
Here you can see the final details


Jen Frankel
December 8, 2021So wonderful. I loved the finished painting, but following your work step by step made it truly magical.
Derry Alex
December 21, 2021Glad to hear that Jen, maybe we can share your works too:)