
Drawing is often lots of fun and a wonderful and satisfying experience for many people. However, over my years as an art teacher, I’ve encountered many who long ‘to be able to draw’ and are quite afraid to make the first marks because they are already convinced that they can’t draw, or they fear failure, or they just don’t know where to start.
In this article, I want to encourage such people and give them the opportunity for enjoyment and success with drawing. The technique is not for beginners alone, as artists of different experience levels and abilities have also expressed gratitude for these ideas.
As a landscape pastel artist, my ability to draw trees is essential – therefore I have chosen trees as my subject.
It is vital to familiarise yourself with the different kinds of trees and draw them in your landscapes appropriately. I live at Bourke in Outback New South Wales – our native trees are mainly Gidgee, Coolibah, Mulga and a selection of different Eucalypts (Box and Ironbark). Because of our dry and harsh environment, our trees usually have thin trunks; and their leaves are thin and spindly. However, our Darling River is lined by mighty River Red Gums with thick trunks, strong branches and long lush leaves.
STEP ONE
Observe a tree and imagine it without leaves. The structure that is left (trunk, branches and twigs) comprises only lines – some straight, some curved or zig-zaggy or thick or thin, or very fine – but only lines; and everybody can draw lines.
Note that the lines are thick at the bottom and gradually become thinner at the top. Also note that there are no two trees the same anywhere; therefore there is no ‘right’ tree – they are all different. The more unusual ones are the most interesting in works of art.
If you can draw lines, you can’t make a mistake with a tree (unless you put thicker lines above thinner lines … because that’s not how trees grow). So, let’s have a go!
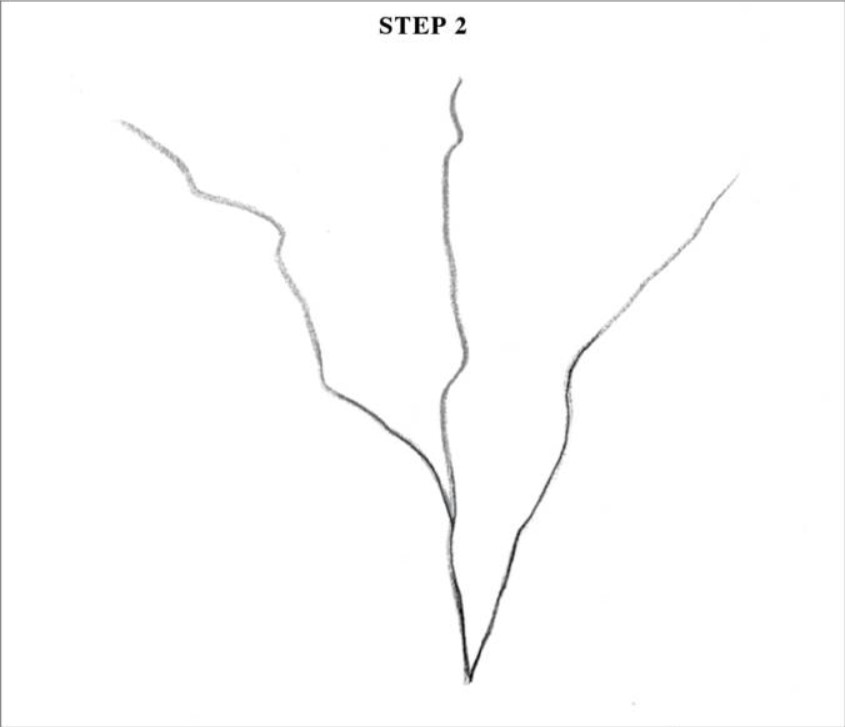
STEP TWO
For the trunk and main branches, begin at the bottom of your tree and draw three, four or five curvy lines. Draw living things in the direction that they grow. These lines will become your trunk and main branches.
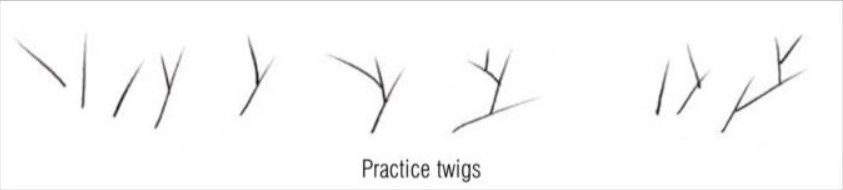
STEP THREE
When it comes to drawing twigs, practice making flicks with your pencil – marks similar to ticks where the end of a mark is finer than where your flick (or tick) began. Add these flicks to the top of your tree like thin twigs.

STEP FOUR
Thicken your trunk(s) and main branches. Add some roots to the tree.

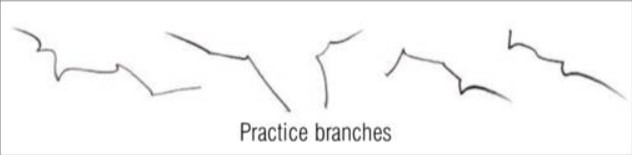
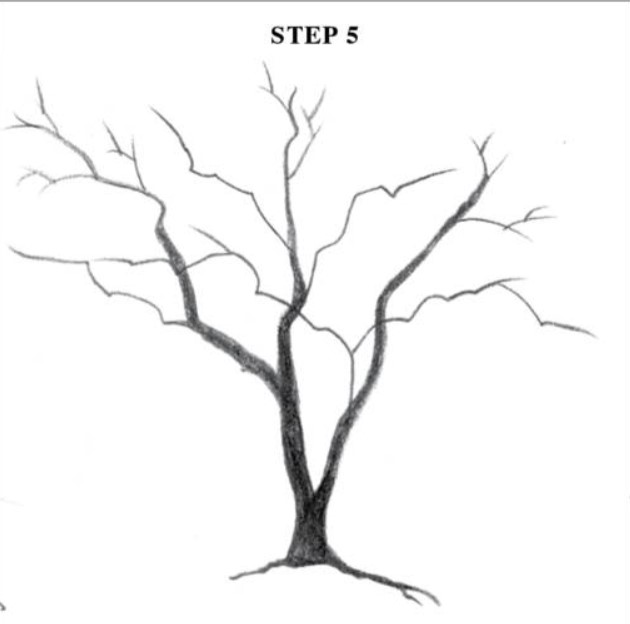
STEP FIVE
To add the other branches, practice some looser strokes by letting your hand freely draw lines rather than tightly controlling the direction of your lines. Draw these lines coming from your main branches They will become the other branches for your tree.
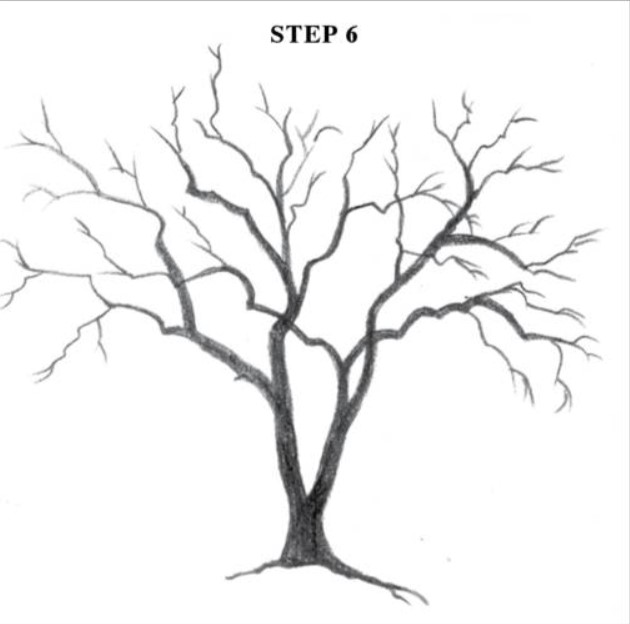
STEP SIX
Thicken these ‘other branches’ appropriately and add more twigs (flicks) at the ends.
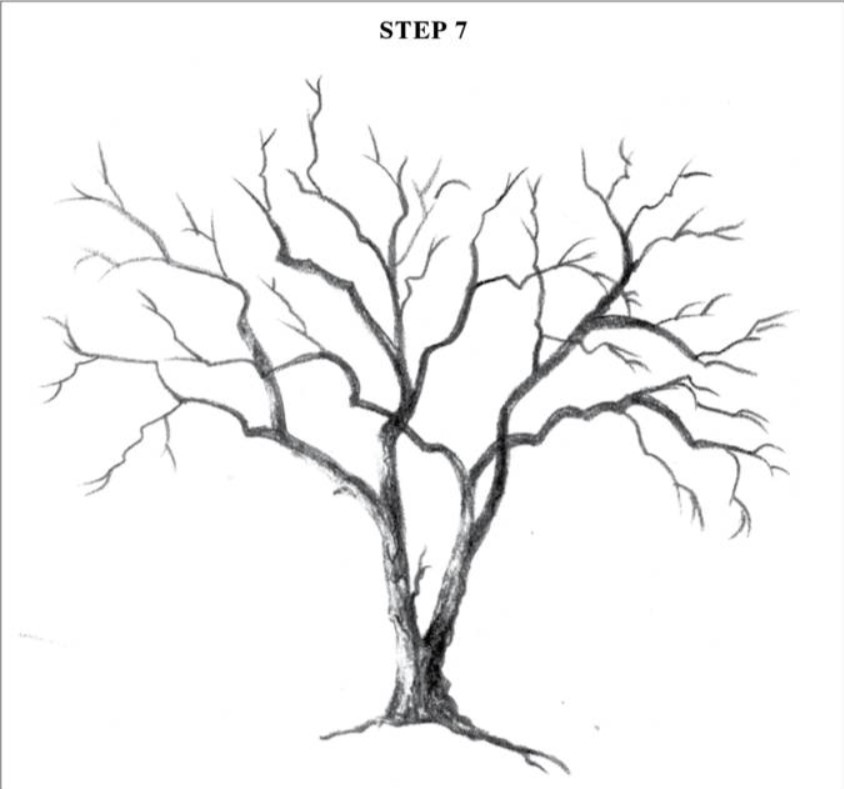
STEP SEVEN
When it comes to adding light and shade, decide where light is shining on your tree and rub back some of your pencil or charcoal in these places. Carefully re-draw some marks to show the texture of the bark.

STEP EIGHT
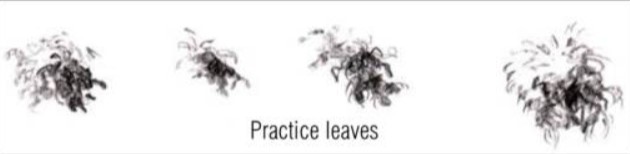
Use the side (not the point) of your pencil to sketch bunches of leaves. Press harder to make dark leaves in the shade and press lightly to show where light is shining on others.
Add a few more twigs or thin branches if needed. Use the side of your pencil to draw a tree shadow in the appropriate place. Indicate a horizon line behind the tree; and finally a few pieces of grass around the base so that it is anchored to the ground.


Bonnie
July 31, 2021The best tree i have ever drawn. those first marks are genius! Thank you.
Derry Alex
September 15, 2021You are welcome dear, maybe you wanna try other guides too?:)
Brard
February 22, 2022My son lives in Illawong and when I have visited him many years ago I went with my husband in Bourke…what a Dream to learn your lesson…
I try and tell hou what I think about my progress… perhaps
Daniele Brard France