MATERIALS
• Soft Chalk Pastels: Art Spectrum and Winsor & Newton. Charcoal pencil.
• Pastel Pencils: Cretacolor and Stabilo CarbOthello.
• Spray fixative.
• Kneadable eraser.
• Scoring knife.
• Pastel Paper: Colorfix by Art Spectrum.
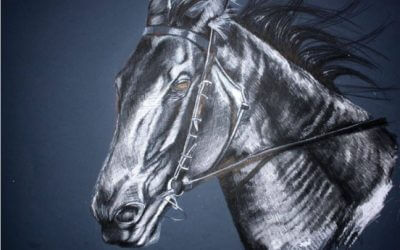
STEP ONE
To do the initial sketch, I create a scaled drawing of the subject on paper (working from photographs). I concentrate on key lines around the eyes, nose and ears. Getting these details correct now is essential to creating a real likeness to the subject. Often I will use a few grid lines to help scale up a subject.
I then transfer this sketch onto my Colorfix pastel paper.

STEP TWO
In establishing a connection with the subject, I always start with the shading of the eyes. I then work my way around other key facial features such as the nose, ears and mouth; or any other feature that defines a particular subject. At this stage, I am using ‘Cretacolor’ pastel pencil – a harder variety of pastel – for greater detail.


STEP THREE
Next, I lay down the background colour using soft pastels; layering the colour down in blocks, then blending the layers together using my fingers. At this stage, I score the cat’s whiskers lightly and then begin to layer colours around the entire face – working from darker tones to light. Fur can be a little difficult, as it grows in a few directions around the face; my method is to lay down a foundation of colour, working in the direction that the fur grows. I then seal this layer lightly with a workable fixative spray.

STEP FOUR
After I am satisfied with the overall colours and tones of the fur, I begin to work in the fur details with a sharp pastel pencil. I also use different shades of colours to push the pastel around in the direction of the fur. I begin the detail around the ‘out of focus’ section around the cat’s neck and work my way in sections to the right of the face.

STEP FIVE
When I have completely covered the face with fur detail, I lightly seal the drawing. I then add in the whiskers; retouch the eyes, nose and ears; and work in some crisp fur highlights and darks around the cat’s coat until I am satisfied with the detail achieved.

STEP SIX
Satisfied that the drawing is complete, I sign the work and lightly seal it for the final time. When I seal an image I find that some of the highlights can fade – so I retouch those highlights and leave them unsealed.