

MATERIALS
• 2B graphite pencil
• 1/2 sheet 185GSM hot pressed Arches paper
• Backing board
• Spray bottle
• Brushes
Small and medium mop brushes
Rigger brush
Flat brushes (1/2 and 1/4 inch)
• Paint
PR 206, which is a Brown Madder or Avignon Orange
PB 16 which is a Turquoise
White gouache
I have chosen to simplify the composition, so this is basically a tonal painting using complementary colours. I have chosen by the pigment number rather than by brand.
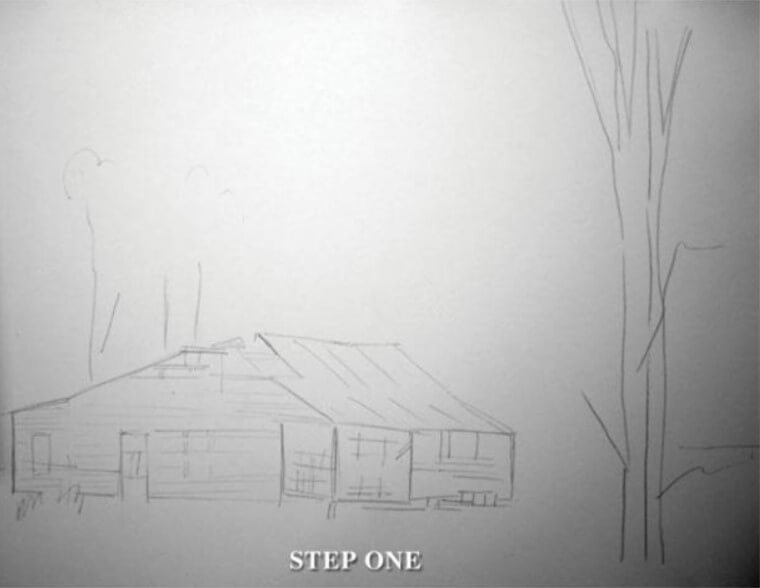
STEP ONE
Prepare the surface i.e. stretch the paper. With 185gsm paper I generously spray each side with water, allowing time for it to absorb and for the paper to buckle. I them roll it out flat with a paint roller and use staples (they always work) to attach it to the board.
When the paper is quite dry, use a soft lead pencil to draw up the important details. Don’t slavishly copy a photograph! Make the decisions about what is important and why. Compose the drawing, altering and rearranging the elements. Loosely draw in the tree elements so that they can be altered as the painting is being worked.
STEP TWO
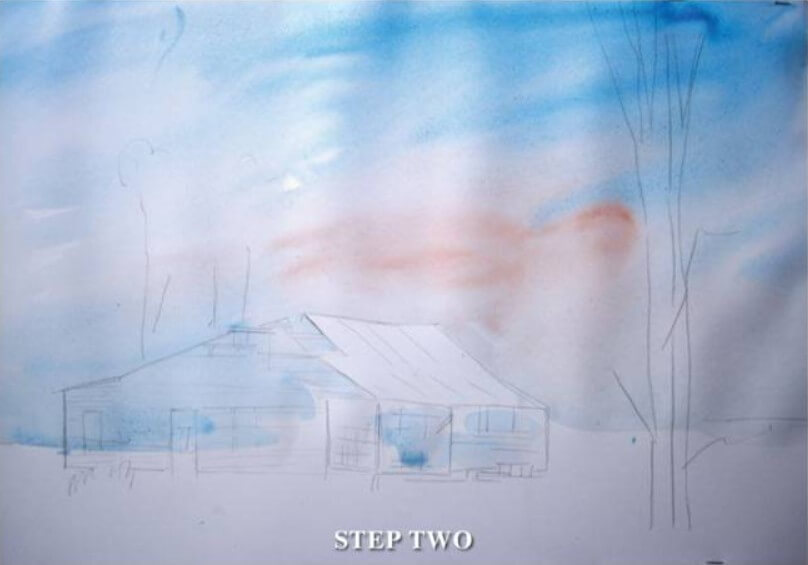
Using the large mop brush, wet the top two-thirds, avoiding the sunlight part of the roof and the sunlight front of the house. Working wet in wet, quickly brush across a Light Turquoise, darker at the top. Add in a few light strokes of Pale Brown at the bottom of the sky.
STEP THREE
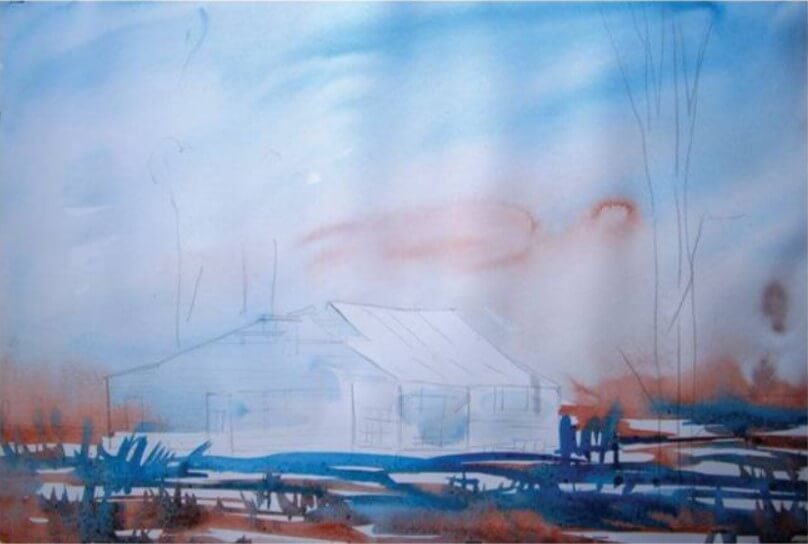
Bring the colour down using wet paint on dry paper. Work horizontal/ slightly diagonal, alternating the colours, making them stronger and darker. Allow them to bleed together. Don’t be afraid to leave some white paper. Add some variation in the strokes to indicate grass.
STEP FOUR
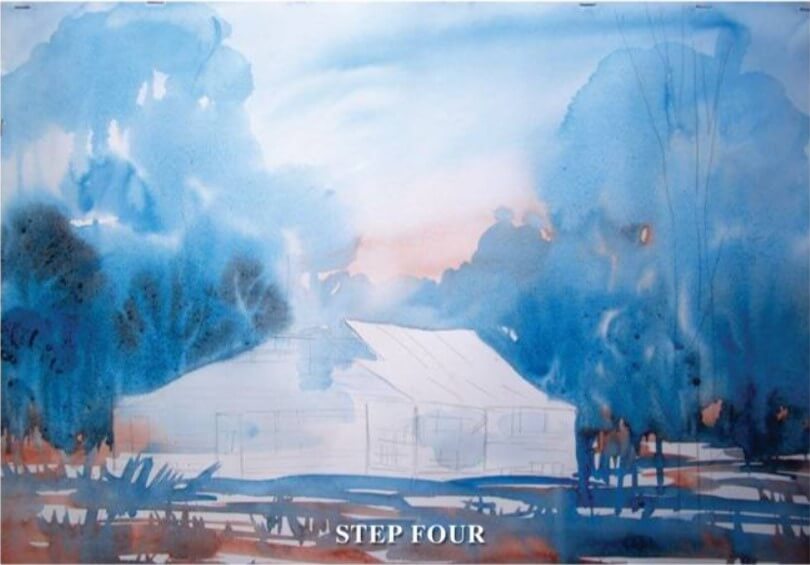
Go back to the sky while it is still wet, and loosely indicate gum trees with a stronger blue mix. Add some brown to this mix as you work the foreground trees. If the paper becomes dry too quickly, a spray bottle can be used. Allow the watercolour to run and bleed. Do not play in the paint or try to correct what you perceive as mistakes.
This is 80 per cent of the painting completed in five minutes. Steps two to four need to be completed without stopping. It is important to work while the surface is still damp. The rate of drying will depend on weather conditions. Allow to dry flat.
STEP FIVE
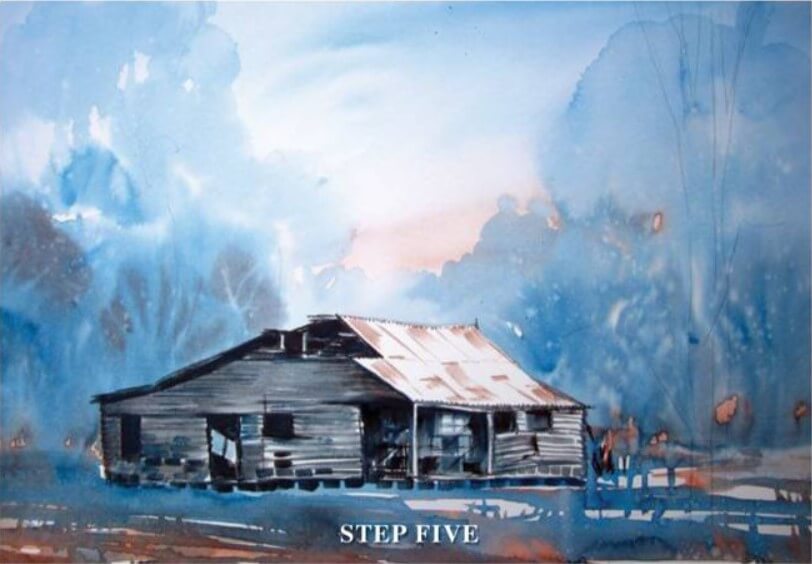
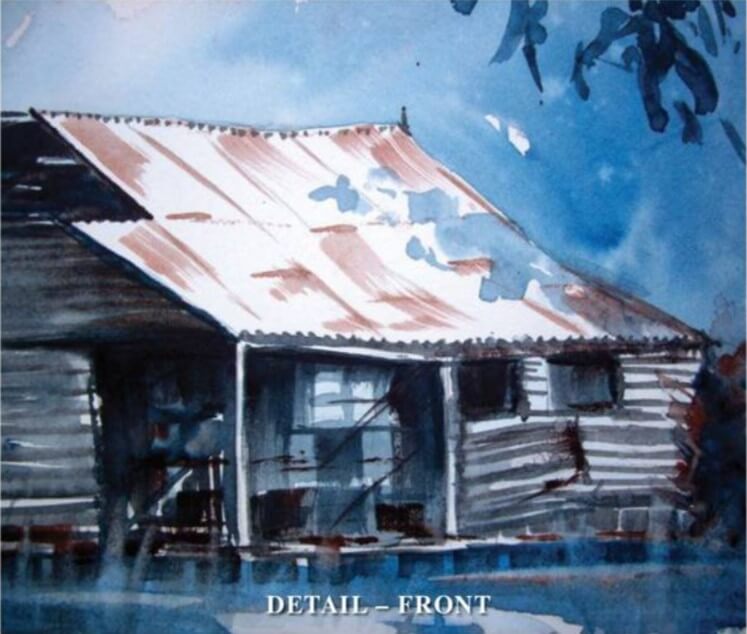
Make a grey mix using both colours. Colours which are opposite on the colour wheel will always make wonderful darks. Using the flat brushes, work the building. Use a darker mix to indicate windows, doors, broken boards and under the verandah. Use some of both colours and random marks to get some variety (see detail, front).
Use the darks for the underside of the house, leaving stumps in the negative. Dot on marks to indicate corrugated iron at the front and top of the roof. Using dry brushing, brush on some brown to indicate the rusty iron.
STEP SIX
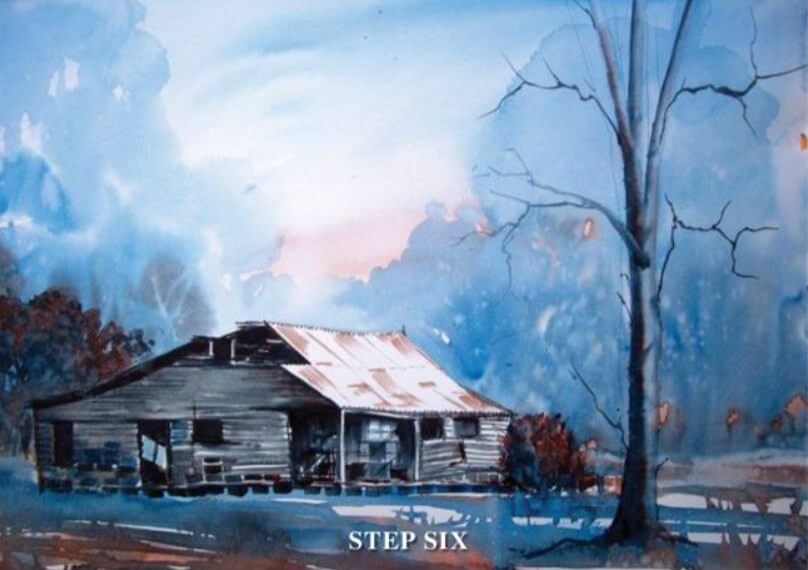
Wet an area behind the house and at the front side. Use both colours dropped in to indicate trees and foliage. Use the spray bottle to break up the colour. Using the lifting out technique, scrub out the colour where the main tree is to go. The shape can still be altered at this stage. Darken the tree on the shadow side. Add in smaller branches using a rigger brush with a dark mix.
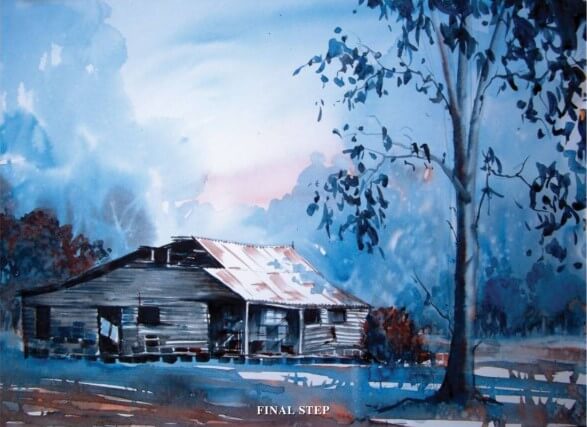
FINAL STEP
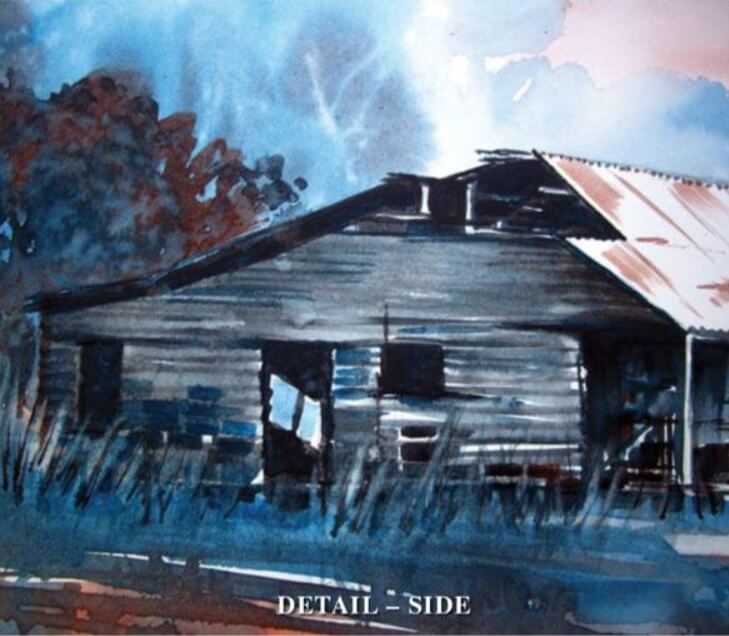
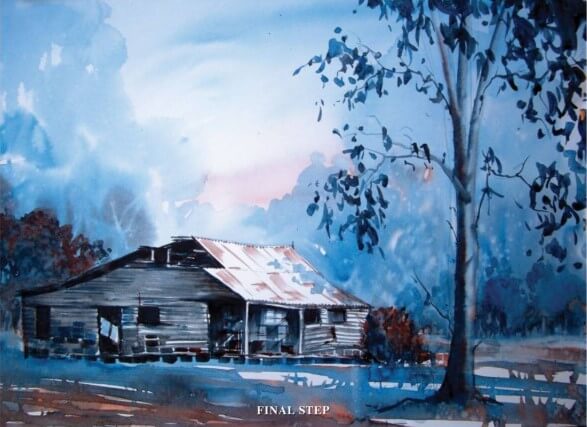
Using the small mop brush, loosely work in leaves, starting with the blue and finishing with some brown for darks. Evaluate and add more foliage and twigs as necessary. Using some light blue, work some shadow of the tree onto the roof. Play with some birds in the tree if you choose. Lift out grass down the side and across the front (see detail, side). Add in some dark grass with a rigger brush around the building and the tree. Lift out some stripes for old fence posts. Darken the shadow side and add a shadow. Add a shadow for the main tree.
Using some white gouache, add some highlights to the tree, the posts and bits on the building as needed. All need to dry completely,then rub out any pencil line that bother you. Sign your work!
Go for it!
ARTIST’S HINTS AND TIPS
• What: Paint where you are, paint what you see, paint what you know, and paint what you love.
• Why: Work out what you like about this image/scene. What inspires you? What is drawing an emotional response from you?
• How: Spend time planning the composition, the shape, size, the medium, the surface, style, colour, light source and the tone of your painting. Do not slavishly copy a photograph. This is your painting. You make the decisions. Always keep in mind why you are painting it and leave out the unimportant details.
• Where: Paint thumbnails (small test paintings) until you are happy that every aspect of the painting has been worked out and that it relates back to your why. Then use your prepared surface.


