
MATERIALS
• Canson board (Canson paper mounted on acid free board)
• Art Spectrum Colourfix Primer
• Art Spectrum Gouache
• Art Spectrum Soft Pastels (occasionally some Windsor Newton,Rembrandt)
• Art Spectrum Extra Soft Pastels for highlights
• Conté sticks and Faber Castell Conté Derwent pastel pencils for fine detail
STEP ONE
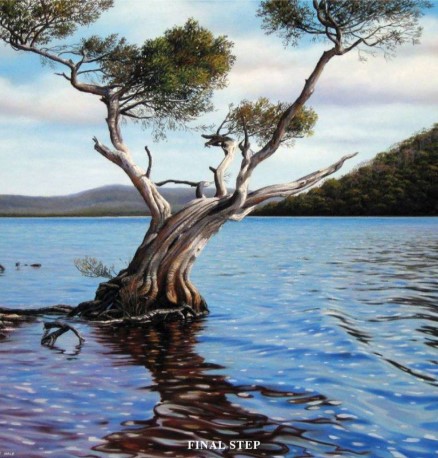
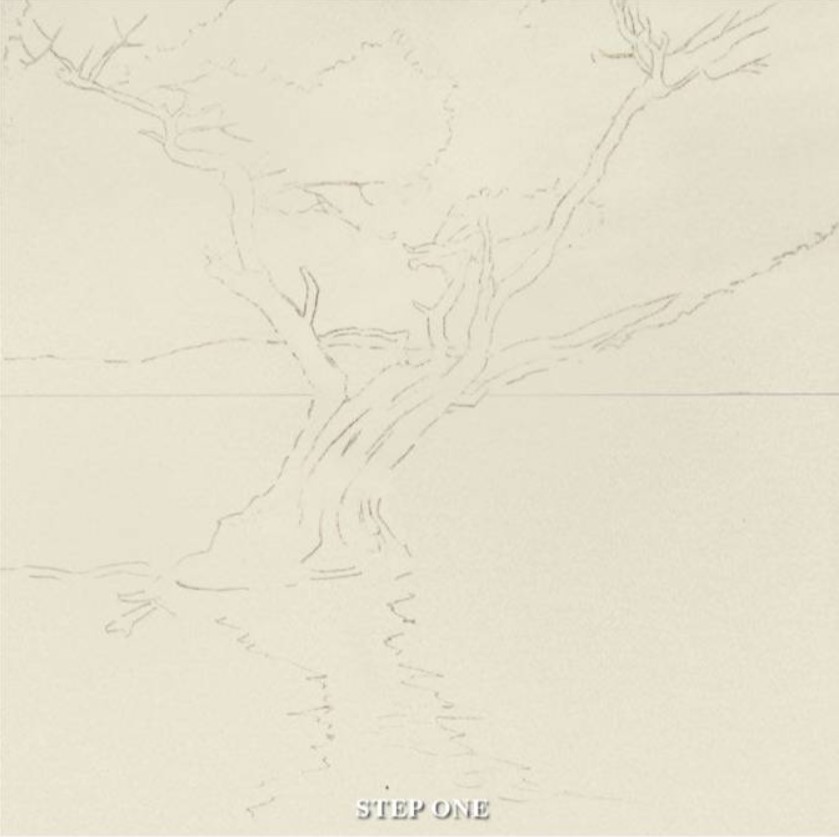
The first stage is to plan the format and composition of my artwork. In this case I have chosen a square format – a square is a solid shape with a natural sense of balance and it seems appropriate for this particular subject. I have placed the tree slightly higher on the page because it will be counterbalanced by the strong reflection in the water and would otherwise appear too ‘bottom-heavy’. I have also ensured that the horizon line is positioned a bit off centre as this would appear to cut the artwork in half.
A simple sketched outline of the subject will do at this stage. Although the intended final result is a detailed representation of the subject matter, there is no point getting too carried away with detail in this first stage because all parts of the board will be completely covered as each stage progresses.
STEP TWO
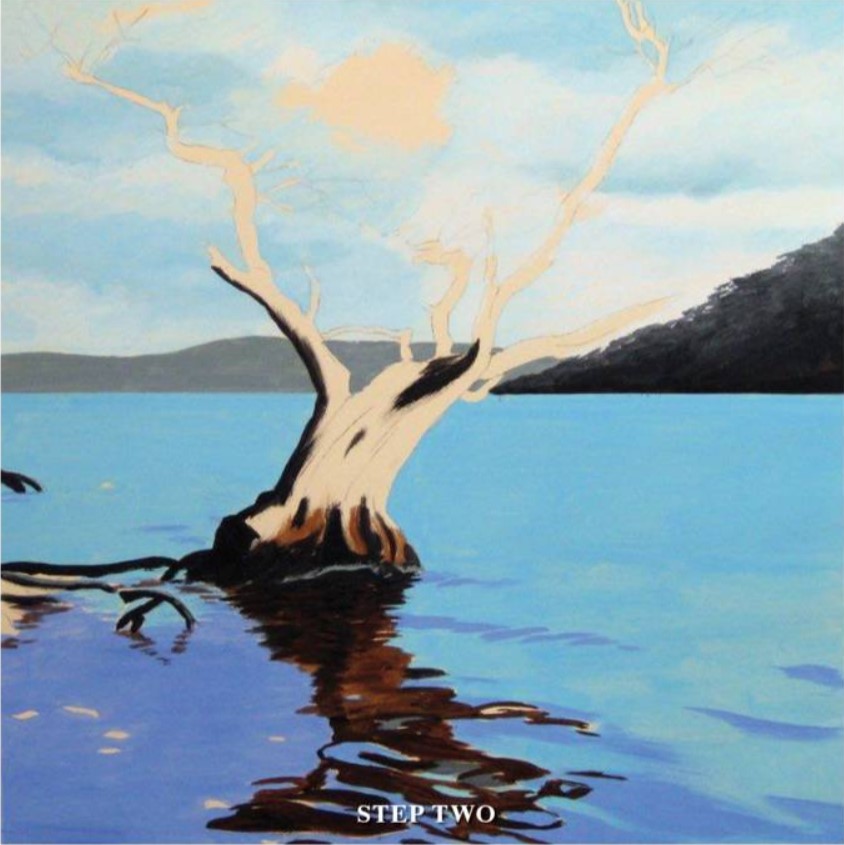
Here I block in the major areas using Art Spectrum Colourfix Primer applied with a large brush. The acrylic primer is quick drying and provides extra tooth for holding the pastel. I generally cover the entire working surface with primer, tinting various sections using a small amount of gouache mixed with the primer (and thinned down a little bit with water for a smoother finish). I leave the majority of the tree untouched as I will come back to this later. When applying the primer I am not too concerned with detail, nor am I wasting too much time matching colours exactly – the main purpose is to block in tonal values and get a better feel for the contrasting elements in the image before starting with the pastels. This makes it easier in the following stages to determine if certain areas need to be lightened or darkened. It makes sense to match the bulk of these larger areas reasonably close to the desired colour, however these sections will again be completely covered with pastel in the following stages anyway.
STEP THREE
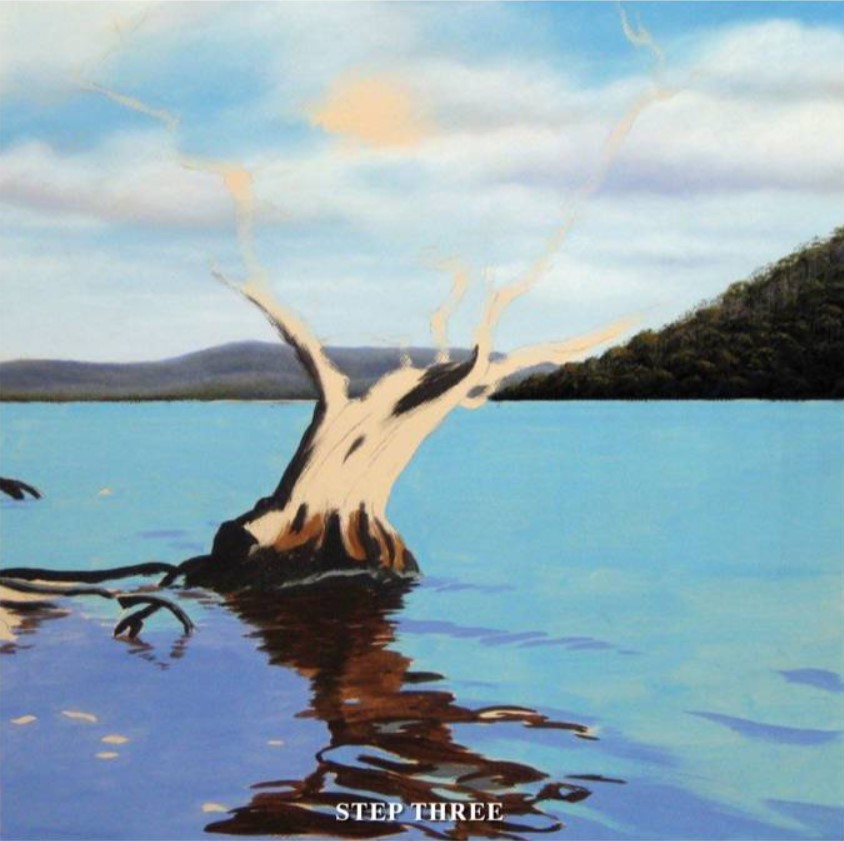
It’s time to bring out the pastels. The general rule I follow for most artworks, particularly pastels, is to work from the background to the foreground and from top to bottom. Pastel dust falls down the board and can affect areas below so I try to finalise the upper sections first before spending too much time on the rest, otherwise it may need to be reworked. So I begin by working up the sky/clouds by blending various shades of blue (Phthalo, Cerulean, Tasman, Ultramarine), grey and white. The background hills are added in using a combination of soft greens, ultramarine blues and greys, and then the intermediate hills are portrayed using stronger, darker colours and more detail which helps to emphasise a sense of distance in the scene.
STEP FOUR
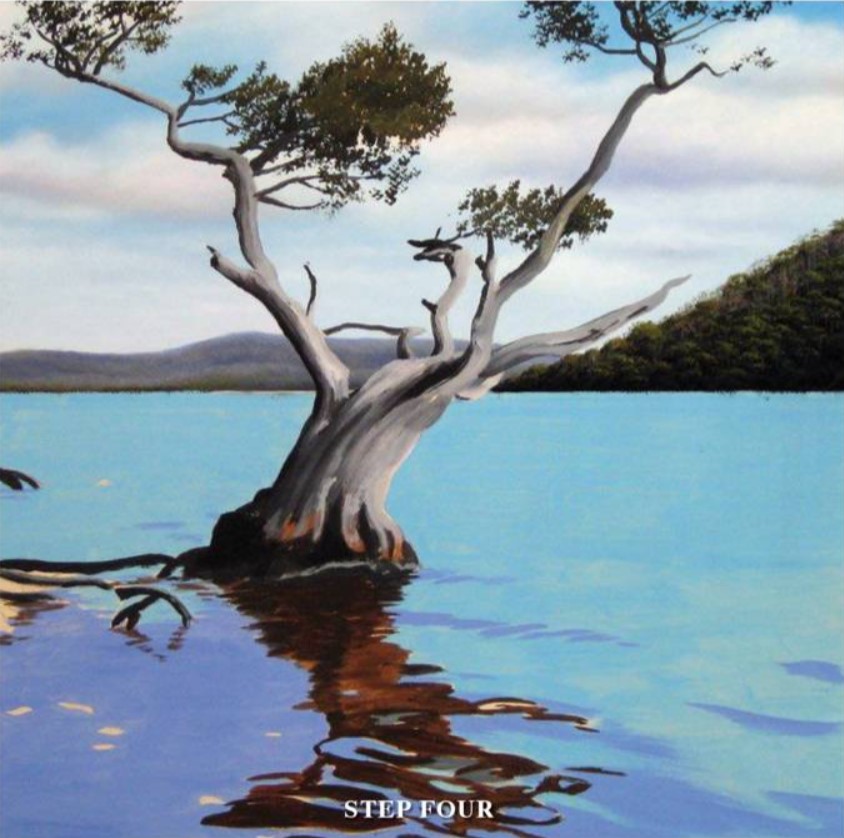
Now that the sky is finished I can continue blocking in the remainder of the tree using pastel primer – this time without thinning down with water. The thicker coat of primer gives even more tooth, leaving a rougher surface which I can use to my advantage later when expressing detail on the truck and branches. Bulkier parts of the foliage are blocked in with tinted primer using a dry brush. Again, these elements will be completely covered with pastel, but the rougher surface will now enable the pastel to be applied more easily and reduces the chance of being contaminated by the light colours of the sky.
STEP FIVE
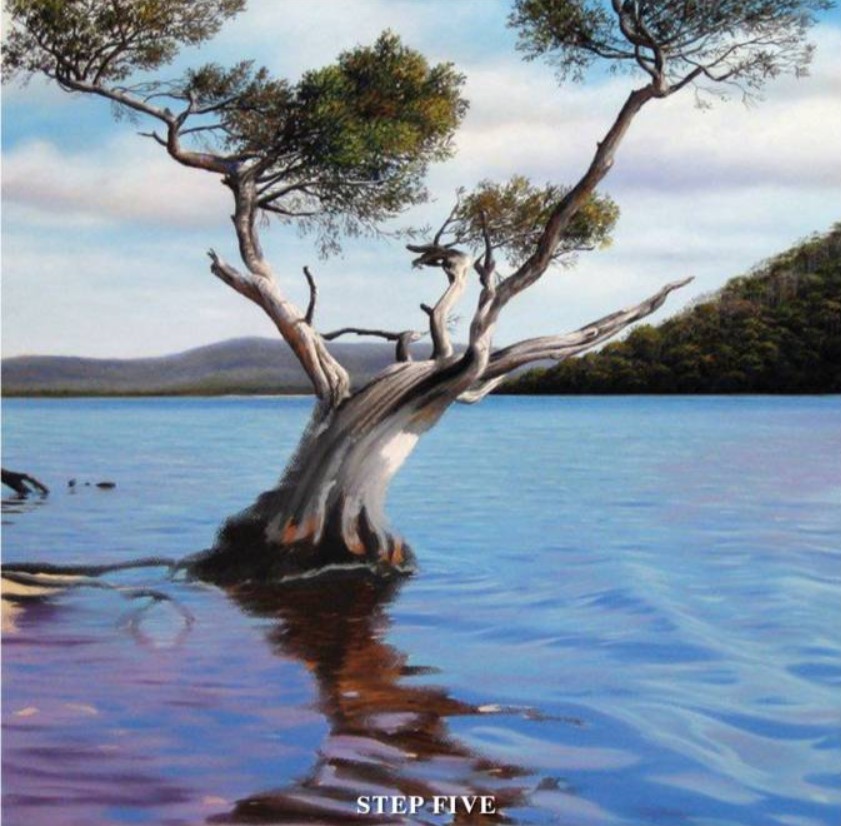
I now begin to add lots of detail to the tree using soft pastels. For the finer twigs I use Conté sticks and or pastel pencils (Faber Castell and Conté). The square profile of the Conté sticks makes them more suitable for handling some of this finer work, which is very difficult to achieve using soft pastels. It’s back to the soft pastels for the foliage – I work up the darker colours first and apply the highlights on top. Now that the majority of the top section above the horizon line is completed I can start working on the lower section. I apply pastel to the entire area of water at this point, now starting to depict some of the lighter reflections and ripples in the foreground. I am after a smooth, silky appearance here, particularly with the water in the foreground, so there is some blending involved using the tips of my fingers.
STEP SIX
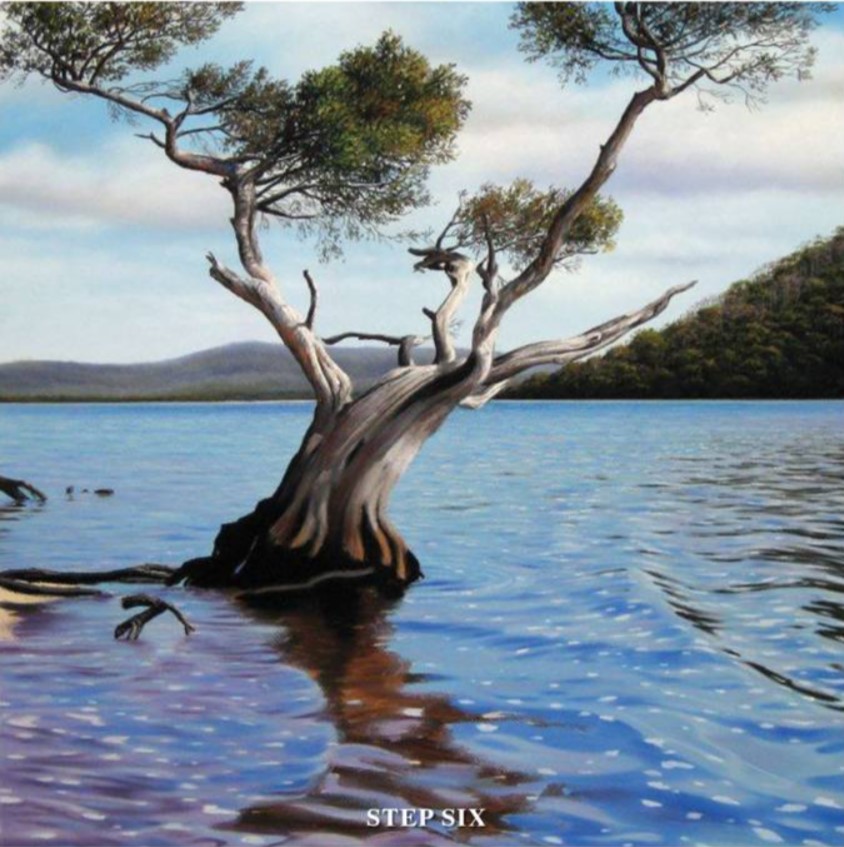
In this next step, the water is enhanced further with highlights and stronger, more defined, reflections. The dark reflections on the right help to emphasise the ripples in the water and add some weight to that lighter section of the composition. We are beginning to get more of a feel of movement in the water at this point. Now that the upper (more distant) section of water has been completed, the rest of the tree trunk is added in.
FINAL STEP
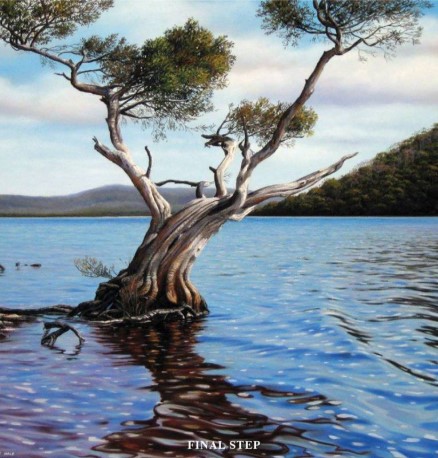
In this final step, more detail is added to the trunk. The thicker coating of primer applied earlier helps out here by providing a nice toothy surface with which to apply further layers of pastel. Adding finer detail to the surface of the trunk helps to contrast this coarse element against the smooth surface of the water which in turn brings this foreground element even further forward. The dark reflection of the tree in the water is then carefully added. It is my intention to illustrate a clean sharp contrast between the dark and light reflections on the surface of the water so I do my best not to contaminate the pale blues with the darker browns and blacks. A few more highlights and finer details are added to the trunk, branches and water.
I find it’s always useful to review your work some time later so you can look at it with a fresh perspective. I almost always come back to a newly completed artwork a few days later and add some last minute finer touches, as I did with this one. The artwork is now complete and it’s time to sign the work.