MATERIALS
• Reference photos
• Ruler (if using a grid)
• Paper
• Stonehenge White 245gsm
• HB Pencil
• Copy paper to rest your hand
• Derwent eraser for use with graphic pencils Faber Castell sharpener with large and small holes
• National Art Materials Workable Fixative
Polychromos pencils
• 101 – White
• 105 – Ivory
• 130 – Dark Flesh
• 132 – Light Flesh
• 176 – Van Dyck Brown
• 178 – Nougat
• 179 – Bistre
• 180 – Raw Umber
• 182 – Brown Ochre
• 184 – Dark Naples Ochre
• 187 – Burnt Ochre
• 189 – Cinnamon
• 199 – Black
• 233 – Cold Grey
• 270– Warm Grey
Acrylic Paint
• Matisse Titanium White
Brushes
• Size 0 Taklon liner
• Soft brush to remove rubber when rubbing out (cheap makeup brush)
STEP ONE
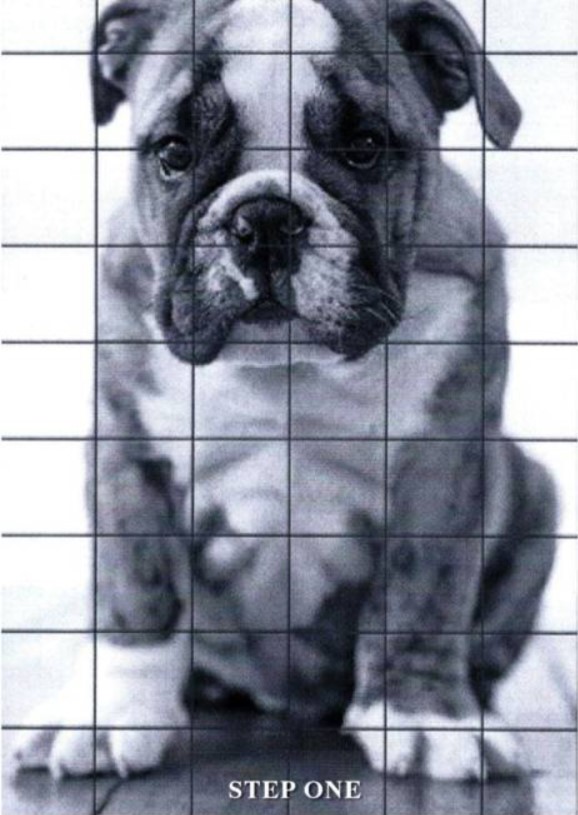
If you are not confident drawing freehand you may wish to use a grid pencilled in on an A4 photocopy of your picture. Using a grid will not put indentations in your paper like tracing will. To make it easier you can use a grid drawing tool that can be found via Google search. First upload a copy of the original photo and choose the grid size and apply it to your photo, save it, and then print it out to an A4 size in black and white. Then draw the same grid in proportion on your paper. Because the photo I am working with is only 6″ x 4″ I used an A4 photocopy in black and white to see the details more clearly. The photo is only for the colour reference.
I have been using Canson Dessin drawing paper, A3 size, 110gsm that comes in a book of 50 pages and is quite inexpensive. For the demonstration I purchased a sheet of Stonehenge white 245gsm paper from an art shop. It comes in a large sheet so I have cut it down to A3 size.
STEP TWO
Carefully transfer a matching grid pattern on to your chosen art paper using a HB pencil, making sure the grid on your art paper is very light. When you have outlines and shapes that you are happy with very carefully rub out the grid. I use a piece of copy paper to rest my hand on so as not to smudge the pencil. I then choose the colours I will using and de-clutter my desk.

STEP THREE
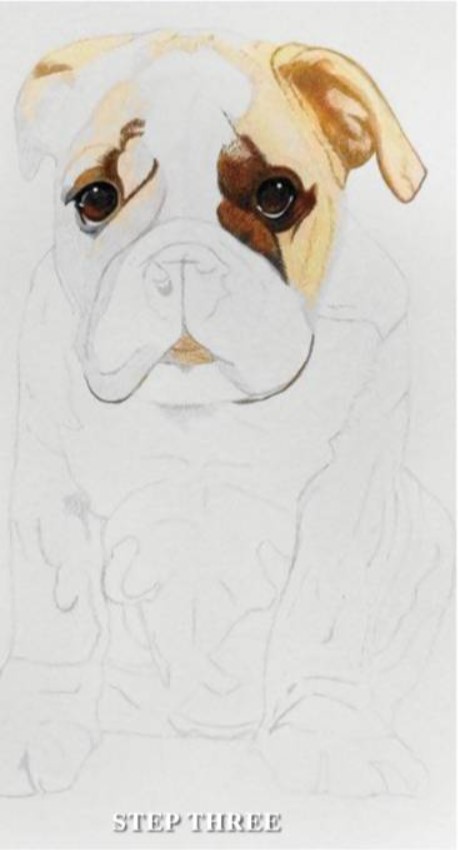
I like to start with the eyes. If I don’t get them right then I start again as I have done with this demonstration, discarding the first attempt. I believe the eyes are a very important feature of your drawing. I feel that an animal’s
eyes are the window to their soul. I start with the lighter colours then change to darker for the pupils. I have used Acrylic Matisse Titanium White with a 0 size liner brush for the highlights on the eyes. You only need the smallest amount of paint and thin it down as it will make the application easier. I find using the paint with a liner brush is a simpler way rather than leaving the paper white for the highlights. As I get more proficient with time I will be able to leave the areas white to achieve the same outcome as I do with the acrylic paint.
STEP FOUR
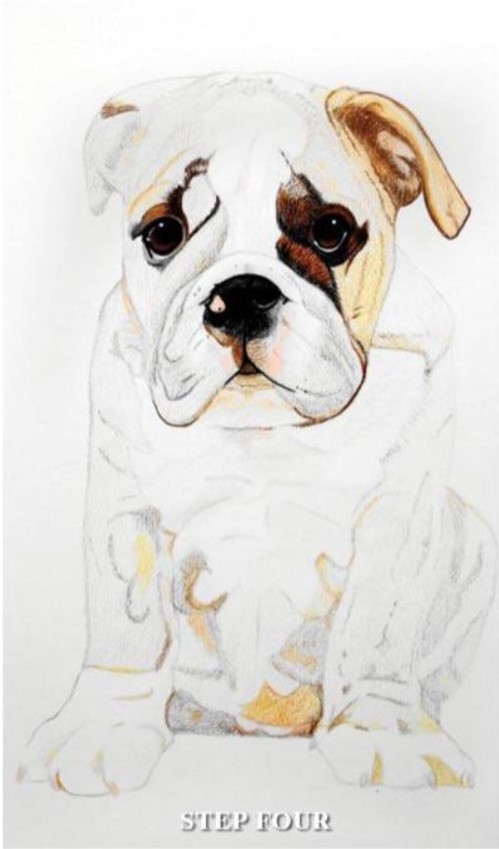
I start to work around the head with the lighter shades, putting in the base colours. As the photo has the light source overhead I have chosen to create the drawing in the same manner with the head lighter than the lower part of the pup.
STEP FIVE
I work on the nose and start very lightly, outlining the body in the colours that I will be using for each area and start to shade the lightest colours.

STEP SIX
I finish the muzzle and then work from top down to the bottom and usually experiment blending the colours as I go. I continue working up the colours until I have a good covering.
FINAL STEP
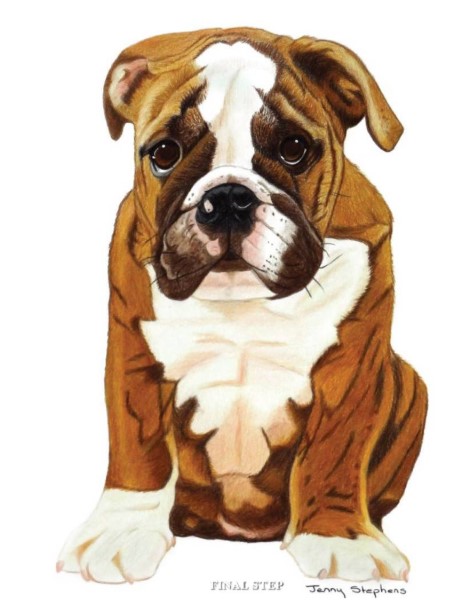
I enhance any distinguishing markings e.g. for the belly of the pup I used Ivory instead of White for a softer look, and I checked for any areas that need to be darkened or accentuated. Don’t forget to sign your picture.
I then sealed the drawing with a spray-on fixative.
ARTIST’S HINTS AND TIPS
• Make sure your working area is tidy and free of clutter; in my case my desk, as it can be a distraction when you are working
• Invest in a pencil extender as they are quite inexpensive and save you throwing out your pencils when they get quite short.
• I use a Faber-Castell sharpener that catches the shavings as it is less messy. I use the large hole instead of the small hole as I find it sharpens the Polychromos pencils exceptionally well, and I have not had any breakages since using this sharpener. Be careful not to drop your pencils as they will break inside.
• Value criticism and value others’ opinions. They will see things you may not see to improve or even change the way you see your pictures.
• Explore YouTube; it has wonderful artists who produce great tutorials that can also show you different techniques and products on the market. You can generally find how to use new products by following a tutorial.
• I buy and read “Artists Palette” every month. It will keep you inspired as well as reading about other artists’ talents and learning how they apply their skills.