
MATERIALS
• Artograph Projector
• Canvas: Pre-stretched canvas 1200 x 600
• Brushes: Mixture of flat and round brushes.
• Paints: Atelier, Winsor &Newton, Schmincke, Matisse.
-Colours: Ultramarine Blue Cerulean Blue Yellow Ochre Burnt Sienna Burnt Umber Forest Green Payne’s Grey Mars Black Titanium White
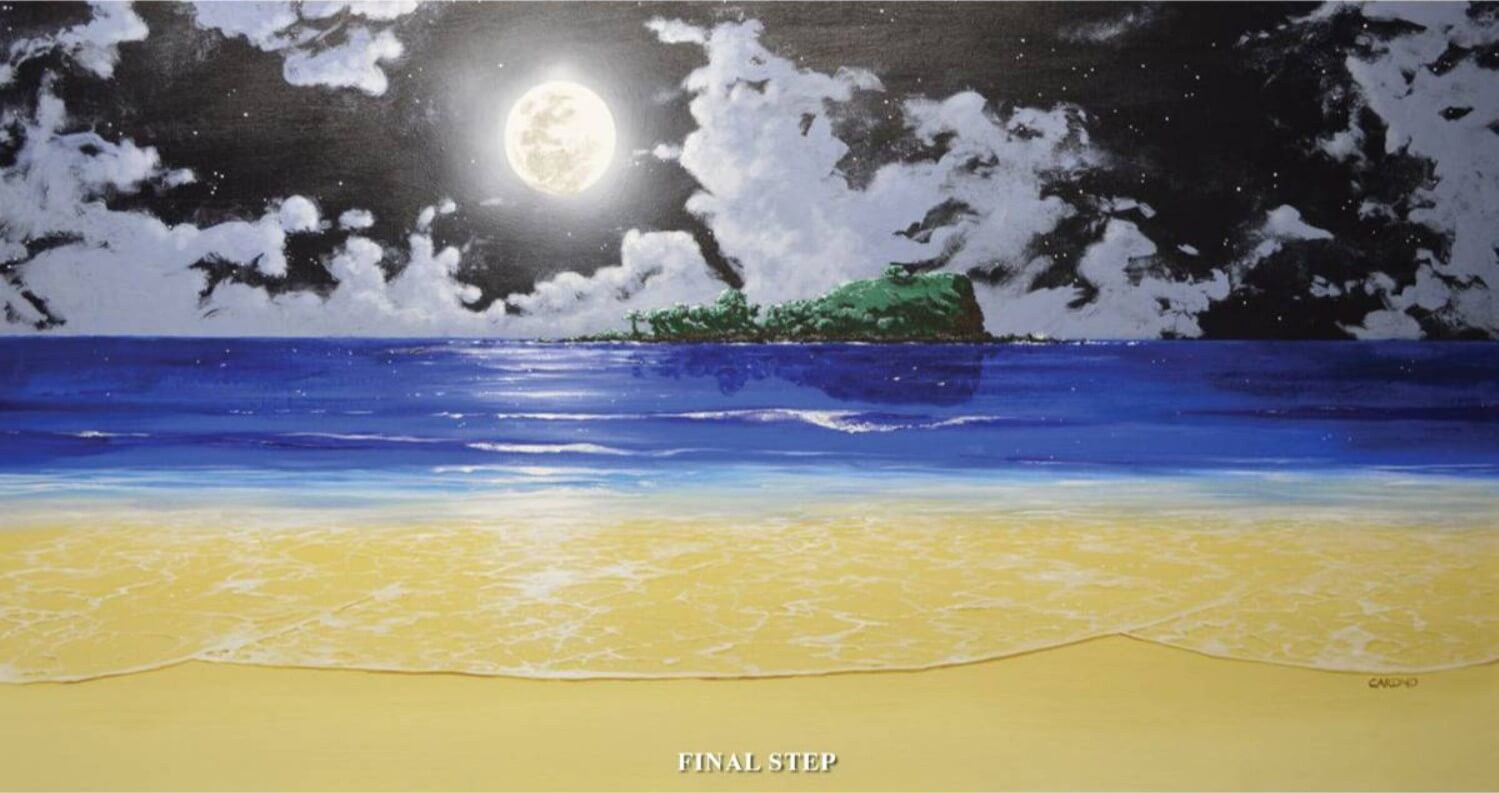
This piece began in my mind – inspired by the real scene I’ve so many times observed. I paint many of my scenes from imagination and in varying degrees use my photographs as extra reference for elements such as this island. In my commercial work I’ve frequently been required to produce concept drawings or fantasy art for various projects and I think this gave me an interest in developing some of my art into more than just what is there in real life. Whilst I also enjoy painting reallife scenes I love creating imaginary images which may be just an expansion on the real-life scenery.
STEP 1
For this art piece I began with a drawing, refined it, and then placed it into my Artograph projector. I then used the projector for quickly and easily getting my small drawing enlarged onto my 1200 x 600 canvas. I feel these projectors are a great way to easily get a hand-drawn piece of concept art enlarged onto a canvas or larger area without the hassle of having to trace or re-size smaller art by more traditional methods.
STEP 2
I used a long ruler to draw my horizon line across the canvas. Following this I used low-tack masking tape (available from Bunnings) along the horizon line to paint the sky against, which left a nice straight marker between sea and sky. I then painted in the sky using a mixture of blues with a dash of black – in this case leaving a circle for the moon, which was outlined with a suitably-sized bottle cap. The moon’s colour is just the white of the canvas. Next I used an airbrush to add a subtle glow around the moon.

STEP 3
Then I painted the clouds along with some highlights to portray the moon’s glow. For the clouds I used a small house-painting brush with strokes in differing directions to create their softness and randomness. They were created using a mixture of Payne’s Grey with a dash of Cerulean Blue, then simple white on a dry brush for the first stage of highlights. The masking tape was then removed leaving a perfect horizon line.

STEP 4
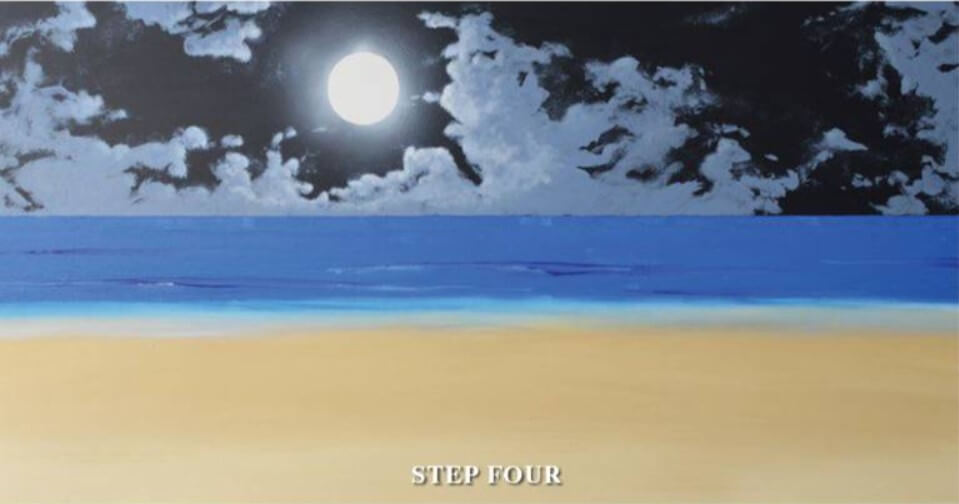
I began on the painting’s lower half with the beach. I made the sand two-tone using a mixture of Yellow Ochre and Burnt Sienna colours and blending them to create the crossover between the dry and wet sand. This darker wet sand stretched underneath the foreground sea wash. I also used a mixture of Ultramarine Blue and Cerulean Blue for a base coat for the water. I often use an acrylic retarder when doing waves and areas where I need maximum drying time in order to blend sea colours.
STEP 5
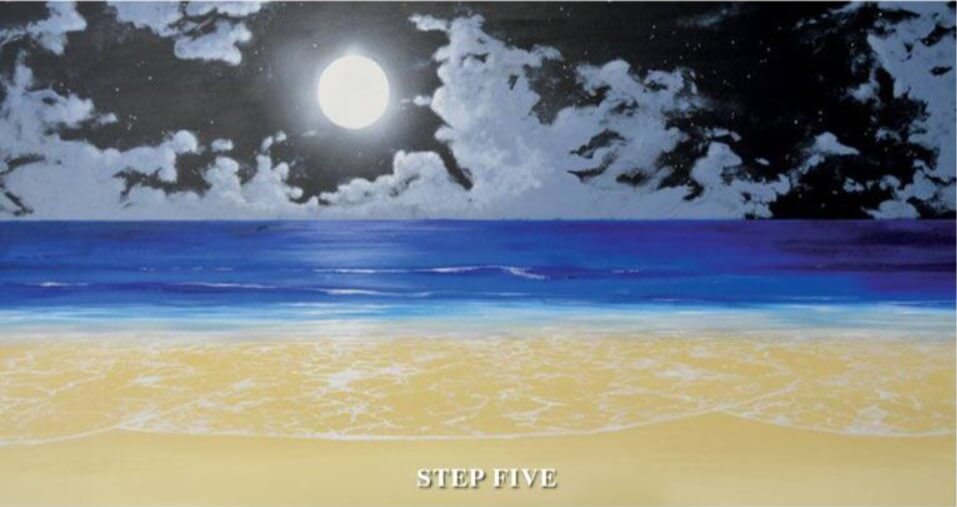
Then I used the same mixture of Ultramarine and Cerulean Blue with a tinge of black to further create the sea and its deeper shades. This is where I used a larger brush to sweep across the canvas in broader strokes. Whilst the paint was still wet I took a smaller flat brush turned slightly on its side to drag through the sea colour to create the few waves which are there.
Adding in the foam and sea wash over the sand and water not only represents the reality of the beach but helps to form the connection between shore and sea. Titanium White was used for the wash with a small No. 4 round brush. Painting this type of sea wash or foam needs for a recognition of perspective and direction. If one’s viewpoint is the centre then the wash needs to appear to flow backwards from the centre of the painting. In regard to perspective, the zig-zags of the wash and foam become closer together the further away from the foreground they get. Those at the rear eventually blend into a white mass where the foam and waves meet and those in the foreground are wider and further apart.
STEP 6
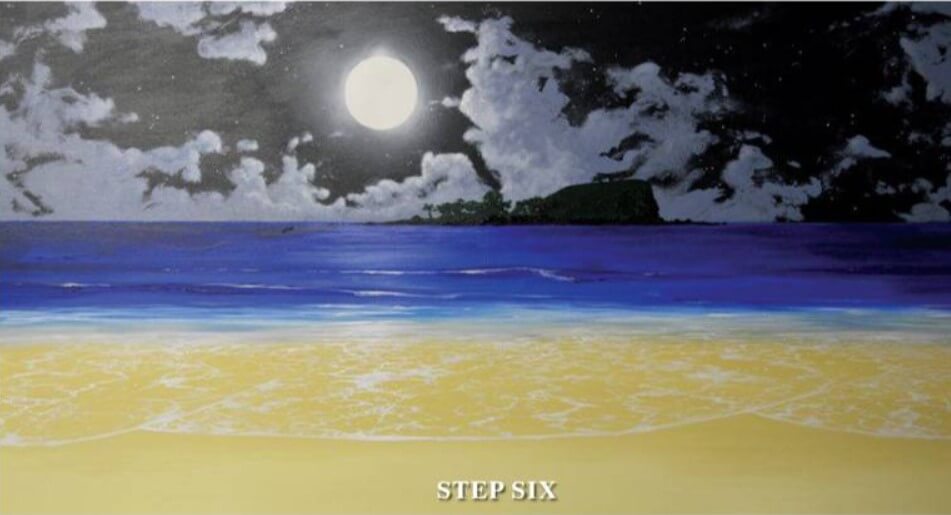
I then drew the island over the painted background using dark green and brown to indicate the foliage and rocky areas. After this was dry I added more highlights to the clouds and dotted in the stars, again using Titanium White and a fine brush. I proceeded to thicken up the white onto the foreground sea foam and wash to accentuate the moon’s glow where its shine comes across the water in the foreground. Also added in a few more stars and highlights in the water.
FINAL STEP
Finishing step. The final step was to add highlighted areas to the green to suggest the moon’s glowing light across the island. I used a fine round brush to paint in the foliage and also add the highlights. I decided to add a reflection of the island in the water to suggest a calmer and more serene image. This was something I had envisioned in my original rough concept but was not sure until the very end that I was going to add it. I dragged my brush through the sea over this part to indicate subtle ripples in the water and add to the effect of a serene calmness in the water on this imaginary night. I put a thin line of Burnt Umber under the sea wash in the foreground to indicate the shadow which the light would cast across the water’s opaque areas. I mixed some Payne’s Grey and used a smaller flat brush to illustrate the moon’s features and this was my final touch on this piece. I wanted to create a piece of art which was based on the real-life scene but also with an added feeling of mystique and quiet serenity about it.

ARTIST’S HINTS AND TIPS
• Large flat brushes I find best for large areas of colour such as sky or the base coats for water. I tend to hoard old brushes as I’ve found them very useful sometimes for creating various dry-brush effects. Generally speaking I find flat brushes of differing sizes the best for water effects and smaller round ones ideal for finer effects. For example, I use smaller house-painting brushes for ‘feathering’ cloud effects in the sky. When I’m painting wildlife with gouache paint I like to use smaller round Taklon brushes because I find them very flexible.
• I find an airbrush very useful for creating small soft effects like this when using acrylics since their blending qualities can be quite limited due to how quickly the paint dries. Airbrushes are great but are a high-maintenance item which need constant cleaning to keep in good working order.
• One advantage I find with acrylics is that you can easily add effects or elements soon after completion because the paint dries so fast.