
MATERIALS
• A3 size canvas sheet
• Derwent Inktense Pencils
• HB pencil
• Fixative spray
• Masking fluid
• Plastic eraser
• Kneadable eraser
• Good quality watercolour brushes
• Liner brush
• Round well mixing palette
• Paper towel
• Derivan Matisse background Folk Black acrylic paint
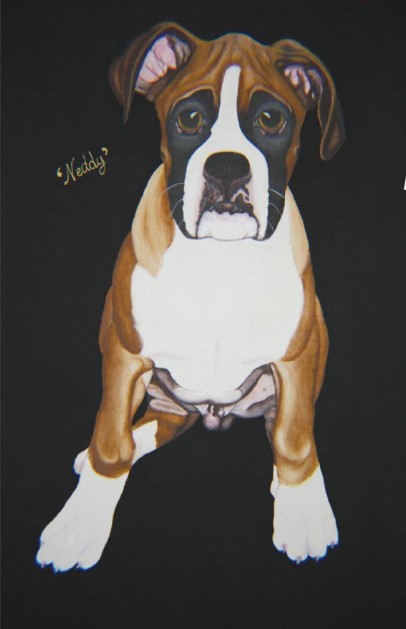
I am going to paint Neddy at three months old from a favourite photograph, using a sheet from an A3 size canvas pad and Derwent Inktense pencils. As the name suggests, these pencils are ink-based and can be used dry or wet, or both. They are especially interesting to use on canvas because you can build up colour with several layers and when needed, you can work off enough unwanted colour with water and a stiff bristle brush to go over with another colour. This I couldn’t do if I was using a watercolour paper.
My set contains 72 colours, and the option of mixing my own. For mixing I use a round well plastic palette, dipping the pencil in water and then working it round and round one of the wells until I have the colour and consistency I’m looking for. I can then paint the colour directly onto the canvas. For larger areas I use the pencil dry, and then go over it with a wet brush. It never ceases to amaze me how this brings out bright vibrant colours. Inktense are non-toxic and dry to a permanent colour.
STEP ONE (PREPARATION)
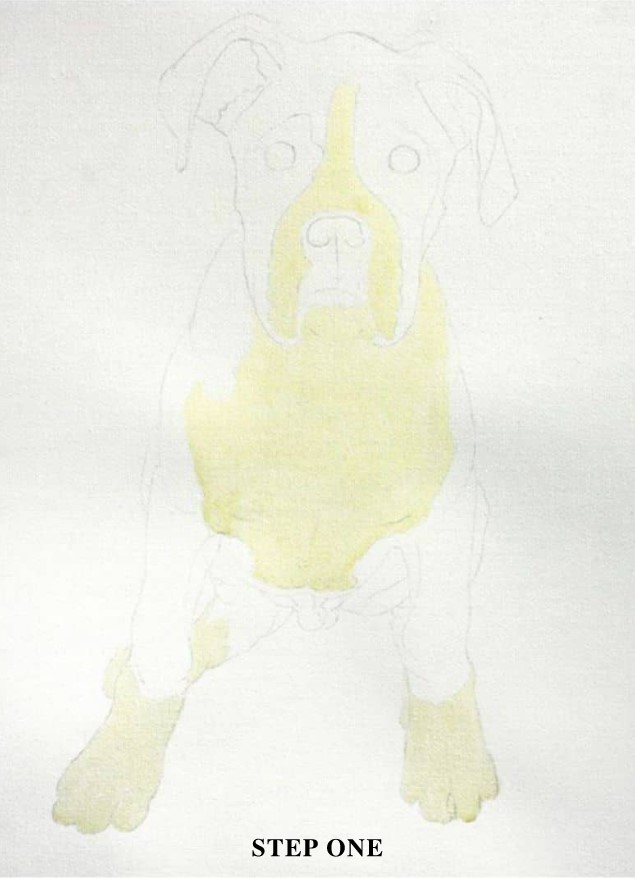
To begin Neddy’s portrait I use a light pencil to draw the basic outline and mark out the placement of important features like eyes, nose, mouth, chest, etc. It is worth spending time getting your drawing just right and saves a few headaches later on.
When I’m happy with the drawing I roll a kneadable eraser over it so the pencil mark is very light, and then spray with a fixative so the pencil won’t blend in with my colours. As Neddy has a lot of white areas and I’m such a messy painter, I put masking fluid on those areas of the canvas I want to keep pristine white.
STEP TWO (EYES/EARS)
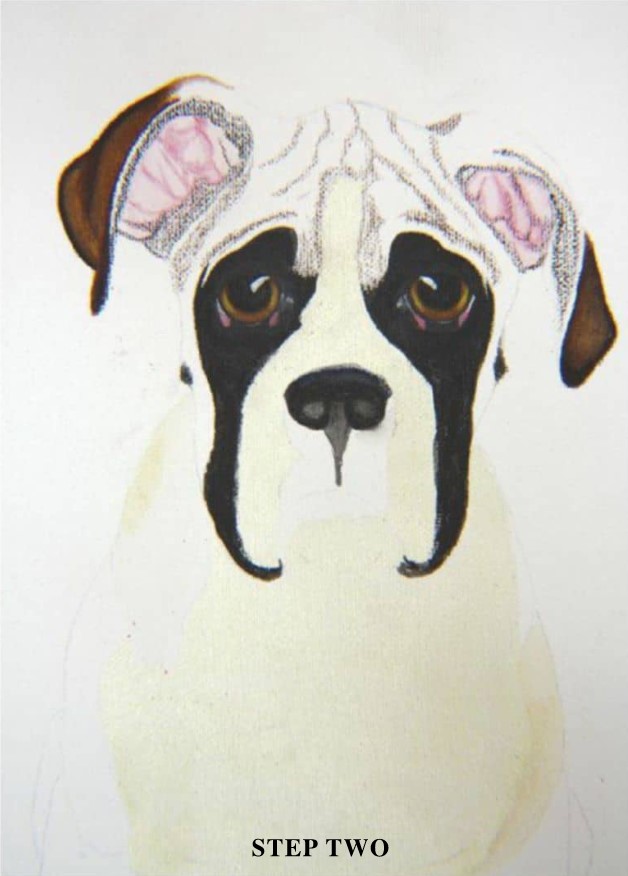
When doing a portrait, animal or human, I always start with the eyes. In any portrait, if you don’t get the eyes right, nothing else you do to the painting will make it better. The eyes hold the essence of the personality. Neddy has large dark bulbous eyes with a drooping lower lid which has pink and black exposed areas. The upper lid covers the top section of the iris and pupil. On either side of the iris I add yellow highlights and a small faint watery moisture line where the bottom of the eye-ball meets the lower lid. To finish off, I add the reflection points to the eyes with the tip of a small brush, taking care to go with the shape of the eyeball. I need a fairly thick mixture for this, so apply my mixing technique described earlier. Then I fill in the black area of the face, including the moles on either side. I mix a soft grey and brush a little around the eyes.
The inside of the ears are an unusual colour of pink. I use the Fuchsia colour mixed with White, applying a soft wash first, then a little darker for the veins. I don’t worry if the ears
look a bit odd at this stage. It will all come together when the whole face is completed, and I can back off any excess with water later. The outside of the ears are quite dark, so I use Bark & Saddle Brown for them, blending the colours together where they meet. Then I back off a little of the colour for the lighter sections.
STEP THREE (NOSE/FACE)
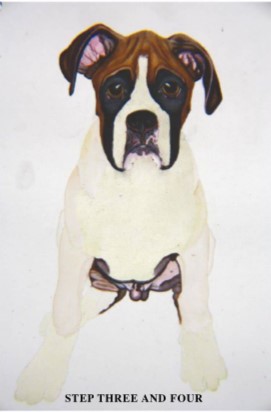
Now I apply Bark for the darker lines on the forehead and Saddle Brown for the head colour. Then I go over that with a wet brush, working the ink around the canvas as I want it. I build up depth of colour with several layers of pencil and lighten where needed.
Next, I paint in the basic nose shape and lay down some colour using Madder Brown lightly and a touch of Fuchsia mixed with White for the area under the nose. At this point I really need to rub off the masking fluid around the mouth to finish this area, but will leave it till last, as I particularly want the white facial area to remain clean.
STEP FOUR (BODY WASH & UNDERCARRIAGE)
Before starting on the body I like to put a light wash over the limbs and shoulders to clarify each area and this also helps to define muscle tone. Then using Bark and Dark Chocolate I paint in the darker areas of the undercarriage, and again use Fuchsia mixed with White for the soft pink areas. I find putting a very light wash over the darker parts of the undercarriage softens the look. I then paint in what can be seen of both hind legs.
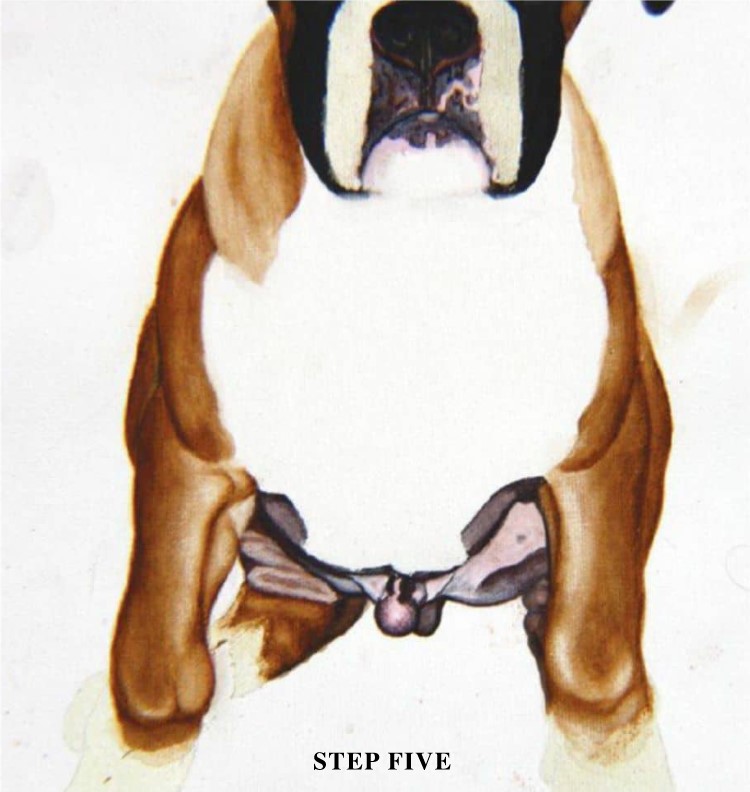
STEP FIVE (BODY)
It is now time to paint the larger golden brown areas of the body. I start with a strong coat of Saddle Brown and then work in some Willow for the darker outer edges. At this point I need to remove the masking fluid from the chest area to complete the sections where the golden brown coat meets the white chest. I use a plastic eraser to remove the masking fluid. When I’m happy with the colour blending I take a wet brush and lift some colour in light areas.
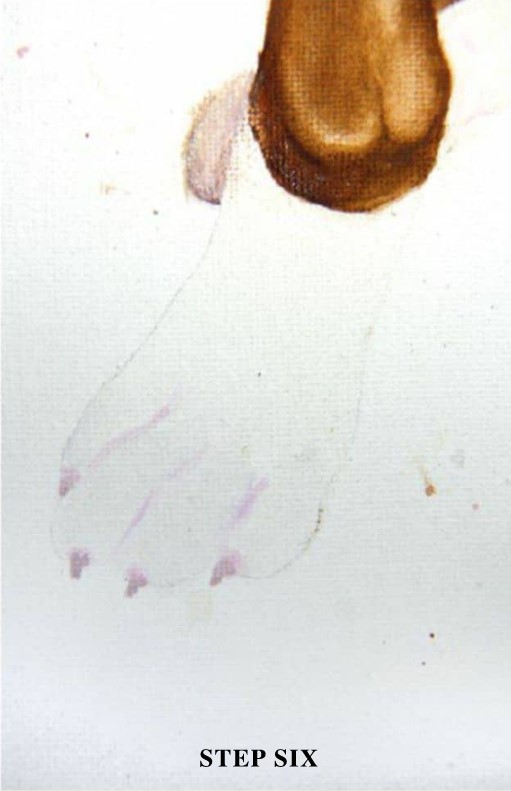
STEP 6 (TOES & TOENAILS)
Now I focus on the front paws to give some shape to the toes. Again, using the plastic eraser, I remove the masking fluid from the paws. With the Fuchsia and White blend, I use a small liner brush to outline the toes and paint in the nails. The nails also have a little soft red-brown to them so I add this using the Dark Chocolate pencil. I also add a little shading to toes.
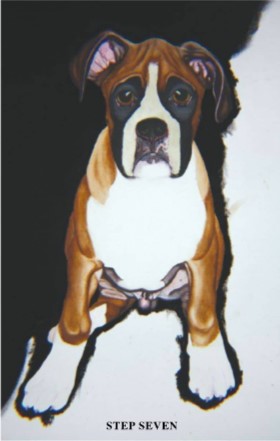
STEP 7 (BACKGROUND)
At this stage I paint in the background, going carefully around the edges of the painting with a medium size soft round brush and a larger brush to complete the rest. I use a background black acrylic for this painting and find two coats gives me a lovely soft flat even black. As Neddy has so much white on him, the contrasting black background really brings him out of the canvas.
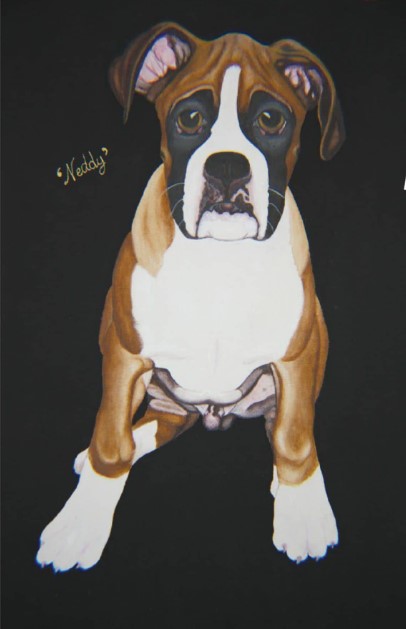
FINAL STEP (CHEST MARKINGS,MOUTH, WHISKERS & TIDY UP)
Then I add in the muscle shadows under the breast area using a mix of Fuchsia, White and a touch of Black to achieve a lilac-grey colour.
Finally it is time to remove the masking fluid from the face and tidy up the mouth and chin area. I create a thick White mix and paint in the whiskers using a fine liner brush. It is also important to lighten the areas around each mole on the sides of the face. Any marks that I have managed to get onto the white areas, I try to lift off with water and a stiff brush. If this leaves a mark I simply go over it with the White pencil. Lastly, I give the canvas a coat of fixative to give a little extra protection to the colours.
ARTIST’S HINTS AND TIPS
• When working from photographs, have several of your chosen subject. For portraits, animal or human, photos from different angles and in differing light can be extremely helpful.
• With any set of colour medium create your own colour chart. They are invaluable! I create mine on a spreadsheet, with the name and number of each colour alongside the box. For my Inktense chart, I filled in each box with its relevant dry colour and then wet half of each colour. This shows me at a glance the colour both dry and wet. I laminated the chart to keep the colours in pristine condition. With 72 colours in my tin, and all colours more vibrant when wet, I would go mad without my colour chart! Oh, and I always store my pencils in the numerical order in which they came. This allows for quickly finding the colour I want.
• When working with a lot of pencils, make yourself a ‘pencil block”. I made mine 13cms x 17cms to fit a tray which came with my drawing table. The wood is about 3cms thick with a 3mm MDF board top and bottom. I nailed the MDF on the top, marked out 2cm squares then drilled holes where the lines met, going all the way through. Then I put the other piece of MDF on the bottom to stop the pencils falling through when I pick it up. This pencil block holds all the selected colours I am using for my current artwork and stops them from rolling off the table.
• When working with the Inktense pencils, I don’t clean off my round palette until the artwork is finished. If I need a little bit of a mixed colour for a touch up, I can reconstitute the colour with a little water. This saves the headache of trying to match the mixed colour.
• Do yourself a favour and buy a drafting/drawing table. You can pick up a good second-hand one quite cheaply. It doesn’t have to be top of the range. You will wonder how you ever did without it!
• Don’t limit yourself to one or two mediums – try them all! Life is short – Have a go!