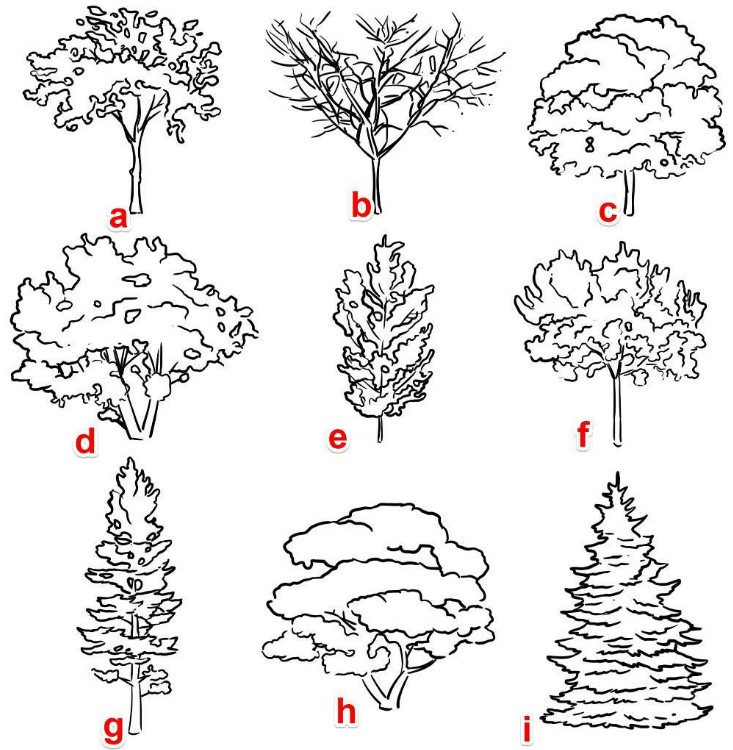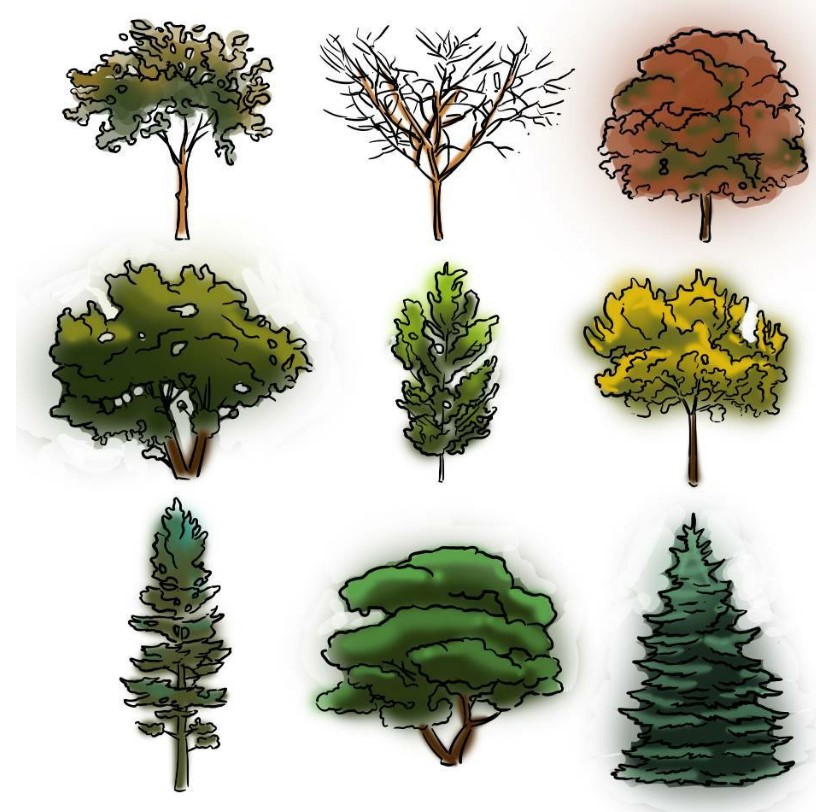
They come in many different shapes, sizes and formations. Not every tree branches the same and not all branches in the same follow one another. They can offer shade, color the landscape, and even provide us with a show as the season changes to fall with vibrant colors. We’re going to do a little something different for this lesson. Take your paper and:
-Make 9 sections
-Label the sections a-i
Now that you’ve done that, I will explain why. I am going to teach you how to draw all of these at the same time. Take a deep breath. It’s not as hard as it sounds. Ready?
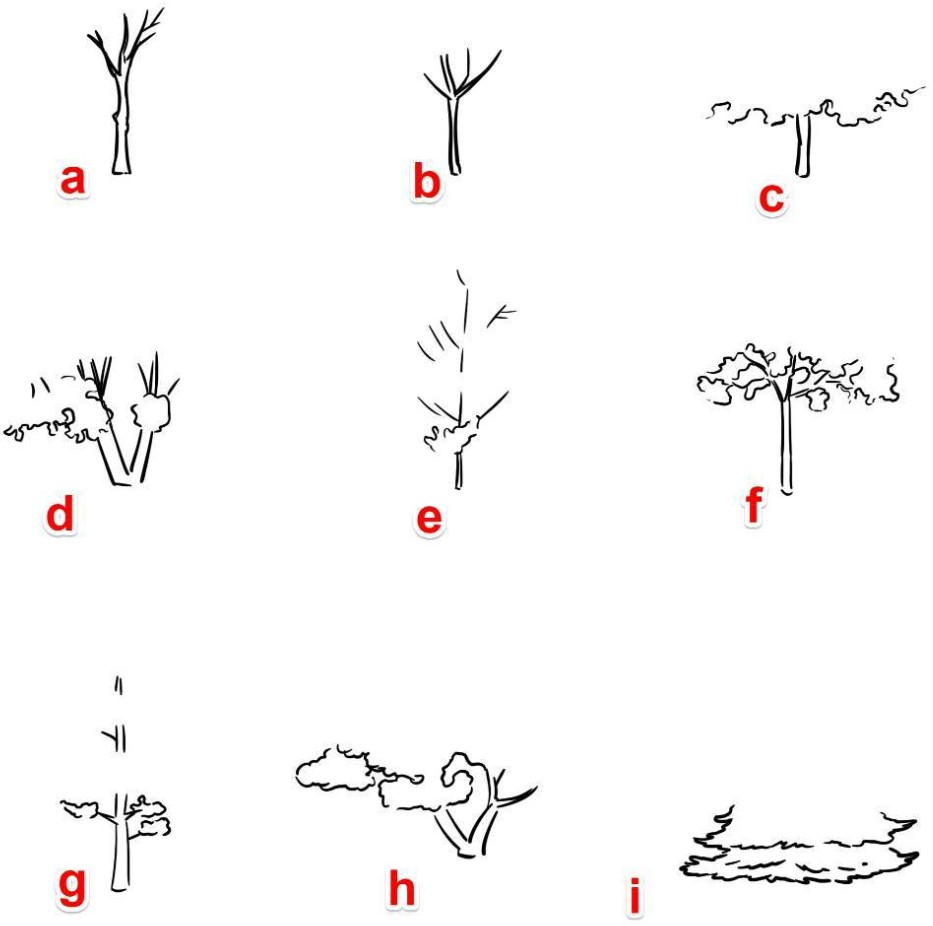
a-Start from the truck and work your way up the tree, using the same method you did for the branch.
b-Same thing as a-1
c-Start from the bottom up.
1-Draw a curved line first as a guide for the skirt of the tree.
2-Make the skirt.
c:(1) Start like a-1(2) Use the curve method to make the leave clusters. (c-2)
e:(1) Draw the lines (2) Add the leaf cluster as in c-2
f: Follow c: 1-3
g:(1) Start form the bottom.(2) Add the leaves and branches as you go up.
h:(1) Draw the base like a “V”.(2) Add the leaves making an outline shape and filling it in.
i: (1) Make a triangle and start from the bottom
a:(1) Add the leaves by making a wavy shape first and fill them in.
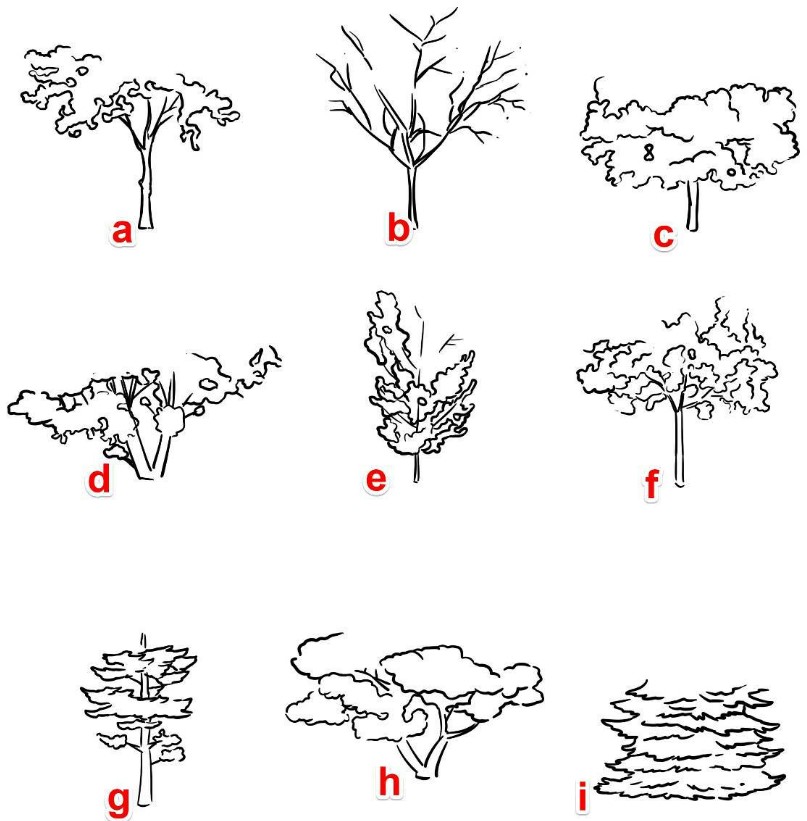
b:(1) Keep making the lines for the branches.
c: (1) Draw flowing curves where the leaves should be.
(2) Add the bumps for the leaves.
d: (1) Follow the directions for
e: (1) Make an elliptical shape for the leaves.
(2) Start making squiggly lines to fill them in.
f:(1) Follow the directions for
g(1) Make squiggly lines for the leaves. Have fun with it.
h:(1) Draw loose circles for the leaves. (2) Fill in the bumps.
i:(1) Make smooth curves which end in angles. (2) Make the curves jagged.
Following the techniques you learned in the previous sections and chapters, cap off the trees. You can do this.
Then go back to the start of the chapter to find out how to color them.