
MATERIALS
• Triple primed, medium weight, cotton canvas – 50 x 55 cm • Heat set paints: Titanium White; Genesis Yellow; Genesis Red, Yellow Ochre; Burnt Umber; Dioxazine Purple 04; Phthalo Blue 04; Ultramarine Blue; Phthalo Green 01.
• Brushes: Taklon flats, sizes 2 to 8; a large blender, size 12 flat bristle brush; taklon liners size 0.
• One heat gun
• Genesis Air Dry Gloss Varnish
• Thinning medium
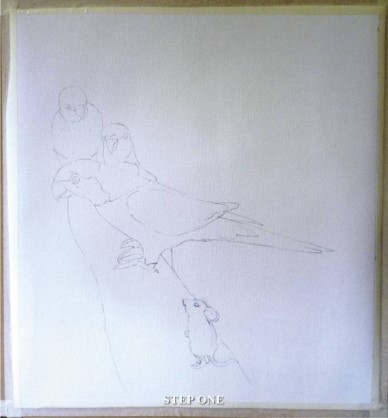
STEP ONE
This is the hardest step; finding a subject. Once that hurdle is overcome, I complete my drawing on tracing paper as it’s much easier to rub out mistakes or even turf out the drawing and start a new. Also, it’s easier to correctly align the drawing onto the canvas. Once I’m happy with the result, I trace over the line work on the wrong side of the tracing paper using soft graphite and then transfer onto the canvas with a stylus.
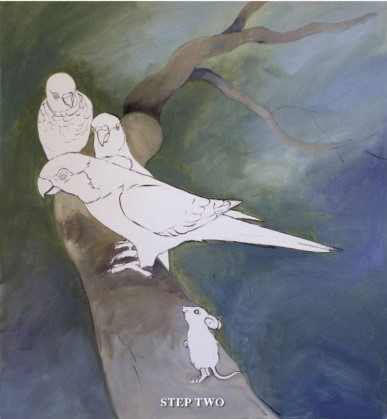
STEP TWO
Outlining the subjects helps in not losing the shapes. I use a liner and thin the paint with a little thinning medium. Then the background is painted in using mixed paint left over from previous work. At this stage getting the colours exact isn’t important. The tree branch gets some covering as well and I extend the branch into the background. Since I’m using heat set oils, the painting gets a heating and it’s on to the next stage.
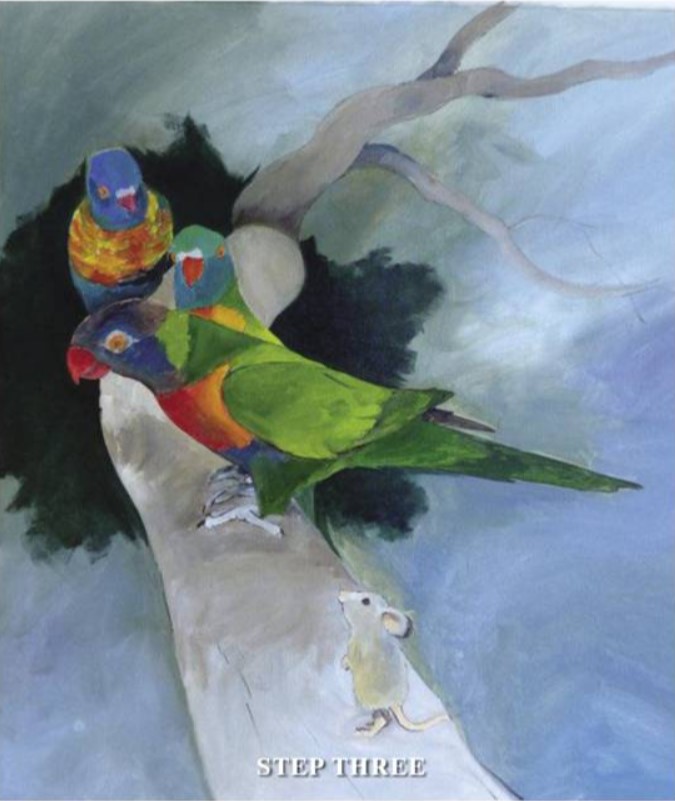
STEP THREE
The birds get filled in. I have used Phthalo Blue and Ultra for the heads and these plus yellow and Phthalo Green for the green parts. Into the shadows, I have added some Umber and Ultra. The chest is painted with a mix of yellow and red, with a little purple for the shadow. Painting Rainbow Lorikeets means that I can use all those lovely primary colours. The Antechinus is filled in as well.
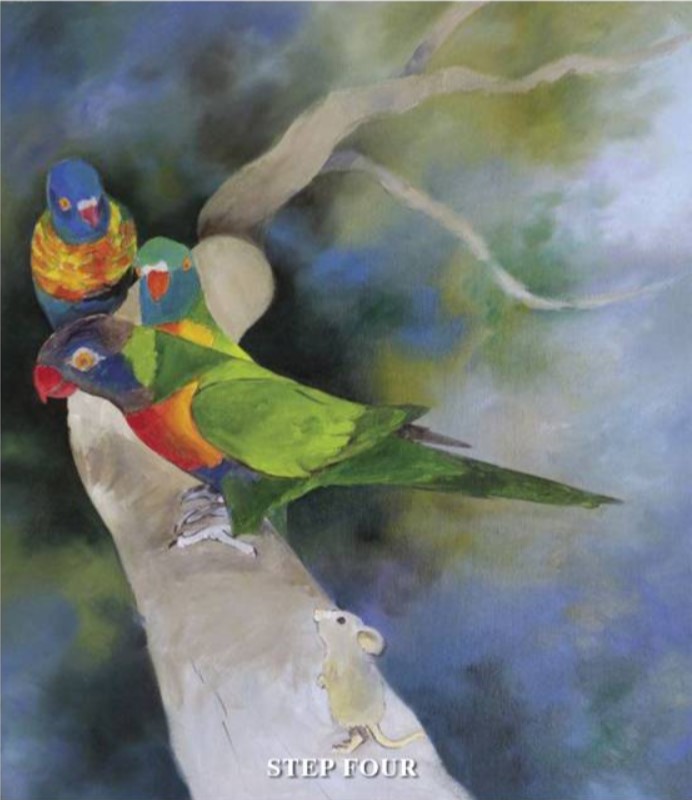
STEP FOUR
The background gets a going over again. This time I’m bringing the colours closer to the finished result by mixing the blues, white, yellow ochre, purple and a very small amount of green (Phthalo Green is powerful stuff) in varying proportions to achieve a mottled affect. Behind the birds, there is a mixture of Umber, Ultra and green, to create the greatest contrast around the focal point and some of this mix is also placed elsewhere in the painting for balance. The background is then lightly softened with the blender, using short strokes, wiping the blender regularly to prevent muddiness.
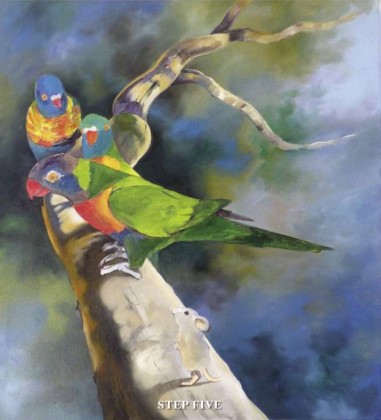
STEP FIVE
After heat setting, the branch gets a work over. As well as placing in shadows for the birds, (my light source is on the right side) I paint in drop shadows, using more purple in the distance, and add some reflected light to the left side of the branch.
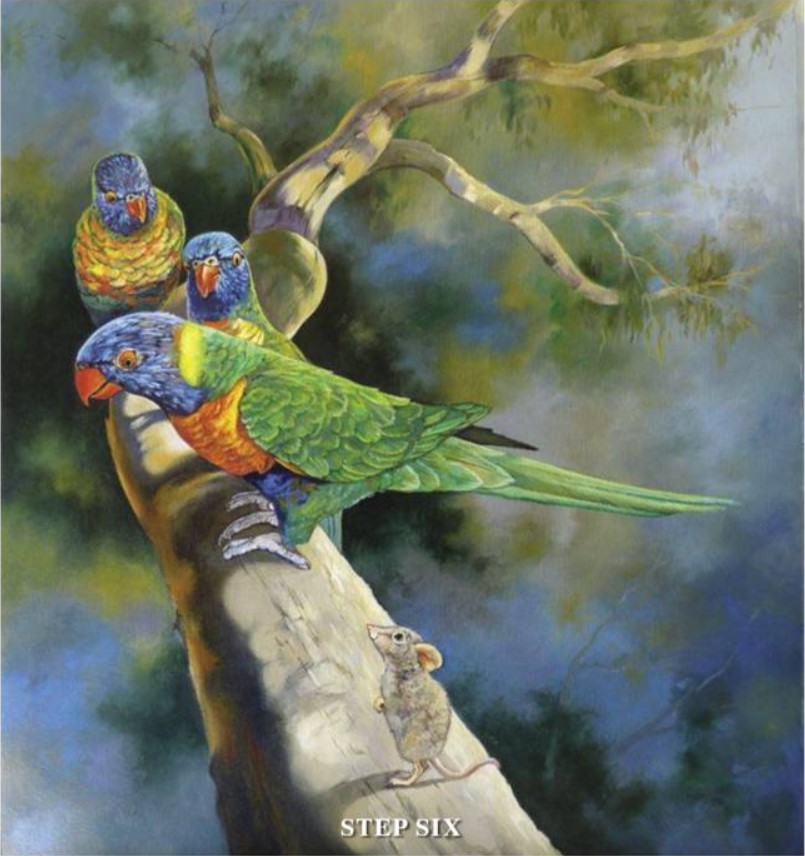
STEP SIX
And it’s back to the birdies and Antechinus. They get another layer and the feathers are defined with a bit of outlining using a liner brush.
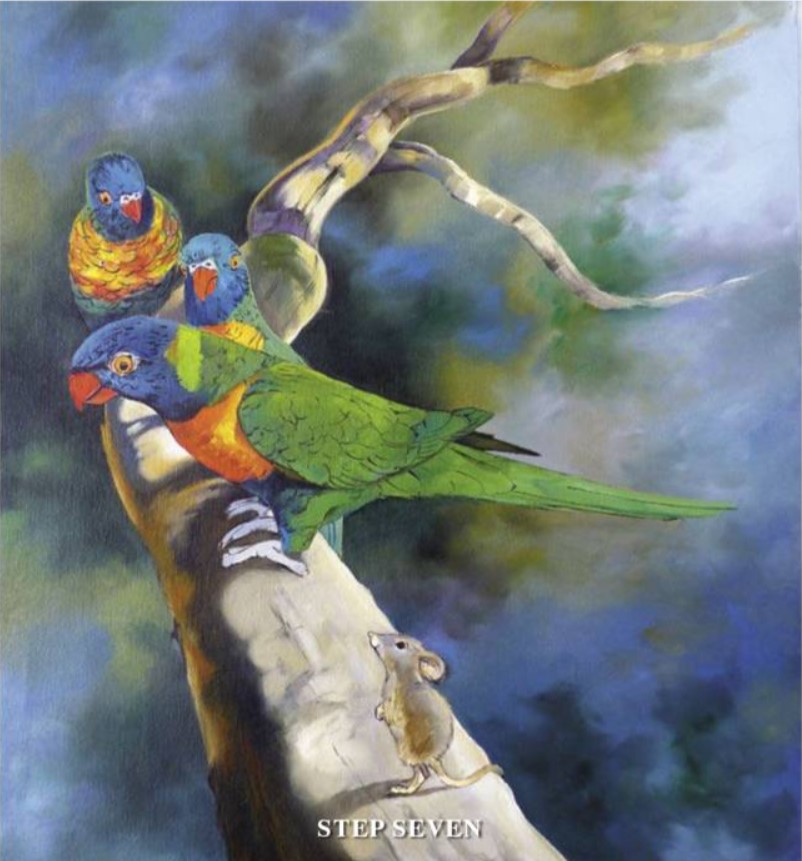
STEP SEVEN
I work on the background again. Some areas are given a bit more paint and blended and I add leaves and branches and some more detail to the branch. The birds are also worked on. The feathers are separated with shadows and the edges are highlighted. The Antechinus is furred up by placing in shades of greys, (a mixture of blue, umber and white) and yellow ochre, blending, adding line work to the fur and also blending this in. Pink is added to nose, ears, tail and feet as well as a little yellow to the feet; after all, it is a Yellow Footed Antechinus. Eyes are painted in, making sure that the pupils of the birds and Antechinus are looking at each other.
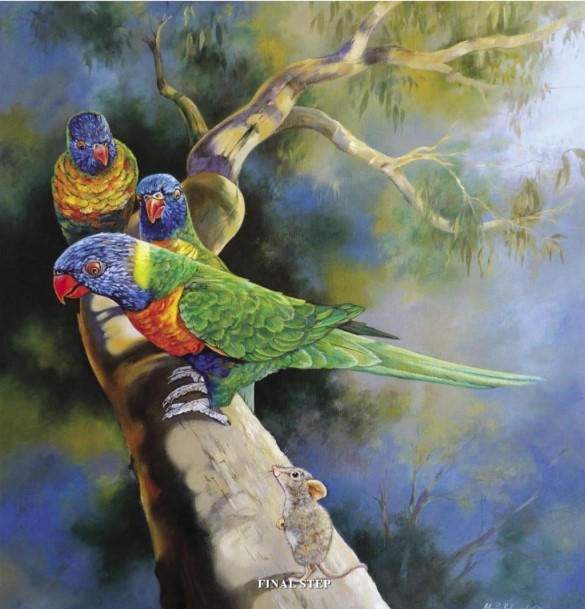
FINAL STEP
Some more branches and leaves are added to the background. The eyes, feet and beaks of the birds get a touch up also. I add a dot of white to the eyes and cheat a bit. So instead of the highlight being directly where the sun would strike, I place the dots a little skewed to accentuate their expressions. The Antechinus gets some whiskers. When I have thoroughly dried the painting, I glue the canvas to hardboard, trim around the edges when the glue is dry and coat the painting with two coats of varnish. I have found that working on a pre-glued canvas to hardboard is not a good idea as the canvas can lift off the board, when applying heat.


